Showing posts with label scroll saw. Show all posts

Monday, February 18, 2019

Make a different spinning top without a lathe


3D carver links:

Tools and materials I propose:

I have always loved spinning tops. To make most of them, you need a lathe. So I decided to make one that can be made without a lathe. It can be made with simple tools as a fret saw but I made it using my Inventables 3D carver.

I begun by designing the vector templates of my top. Next I imported my design into Easel. Easel is the online software my 3D carver uses. I imported my template as an SVG file and set the machine, to cut outside the lines. I chose my cutting bit and run a simulation, to see how the machine was planning to carve.

For this project, I used 5mm plywood.

It is important for the material to be secure and flat. So add as many clamps as you have to. I then homed the machine manually, and started carving.

The carving session leaves a few tabs on the piece. I removed the tabs using a chisel.

I did three carving sessions. Each time I changed my design a little bit, until my joints fitted nicely.

I sanded my top with 100 grit sand paper. I also made a sanding file using a popsicle stick, double sided tape and sandpaper. 

I then glued the parts of my spinning top together.

If you don’t have a cnc machine, you can still create an easel account, enter my Inventables project page and download the templates of my top. Next you can glue them on a piece of plywood using spray adhesive.

To cut the templates, you can use a scroll saw or a fret saw. In both cases you need to drill you saw blade’s entry holes. If you use the bandsaw for the outer lines, be extra careful, because you will be cutting small pieces and your hand will be extremely close to the blade.

If you use the fret saw, make a small bench jig to help you out. A set of small files will also be handy for you to finish shaping.

Next I wanted to make different tops for my top’s top. So I used a V carving bit, to carve a few different designs. I then changed to the straight bit again to cut the shapes out.

I painted the caps with latex paint. I like latex paint, because it is water based, doesn’t smell bad and it dries really fast. To speed up the drying process, you can use the heat gun.

To remove the excess paint, I just sanded the pieces.

The different designs, produce different animation effects, as the top spins. I really like the spirals most.

My tops came out great and spin for a really long time. I really enjoyed this project and I hope you’ll make a few similar tops yourselves.

At this point I would like to thank Inventables for sponsoring this project.

But that was it, see you soon with a new project video!


Disclosure: Some of the links below are affiliate links, meaning, that at no cost to you, I get a small commission if you click through and make a purchase.

Sunday, July 26, 2015

How to make a wooden toy boat


I wanted to make a summer project. I wanted to be fun and if possible to combine playing in the sea. So I made this toy boat out a few scrap spruce pieces and an oak dowel.

First of all I designed a template, glued it on the wood with spray glue and cut it out on my scroll saw.

For the propeller of the boat I planed down a wood piece. To do that I clamped my plane upside down on my vise.

I joined the two pieces of the propeller with a half lap joint.

To sand the pieces I used 80 grit sand paper and my metal ruler in order to sand the curves of the boat.

Then using a round over bit on my router I rounded some of the edges.

Using a conical bit I made a bevel on the bottom of my boat.

I glued everything together using two part epoxy, because it is water proof.

I made a jig to cut the dowels to the same height, using my flush trim saw.

I wood burned the name of my boat.

I finished the piece with 9 coats of polyurethane varnish while sanding between coats. I used 2/3 poly and 1/3 thinner for my mixture. I did that because I wanted my coats to dry pretty fast.


After everything was dry I added a rubber band on my propeller and my boat was ready!


Free plans for the boat here.

Friday, July 10, 2015

How to make a wooden hard drive enclosure


Recently my PC technician changed the hard drive of my laptop. So I had the old hard disc laying around and I have decided to make an enclosure for it, out of plywood. This way I can still use the hard drive as an external file storage device.

First of all I traced the shape of the disc on a piece of plywood using a pencil.

Then I measured the side of the disc using my caliper.

Using a straight bit on my router I freehanded the hole for the disc on the plywood. I completed the routing process with two passes.

I used a chisel to make the hole a little bit cleaner.

I then measured the outer areas and cut the piece to size with a hand saw.

I straightened the edges on my belt sander.

For the bottom of the case I wanted some ventilation holes. I glued a template on the piece using spray glue and drilled the holes on my drill press.

I used rust remover to remove the template.

For the top of the piece I used a thin plywood piece with my logo on it. I drilled the starting holes on my drill press and cut out the template on my scroll saw.

I then drilled pilot holes for the top screws. I made countersinks using the appropriate bit.

After screwing the top, I used the flush trim bit, and trimmed everything flush with my router turned upside down.

I sanded the piece.

In order for the disc to be locked in place I made two metal brackets.

I cut the pieces out of a scrap metal piece using my dremel tool and a grinding disc.

I drilled the holes for the screws.

I applied a few coats of black spray paint on the piece.

I applied a few coats of clear varnish.

I screwed everything in place, added the sata to usb adapter cable and my external hard drive is ready!


Monday, April 27, 2015

DIY led lighted sign for the home cinema


I decided to make this sign out of plywood, MDF and led strip.

First of all I used my circular saw to cut the pieces for my frame out of MDF.

Then I used a hand saw and my miter box to make the cross cuts.

I glued the frame and clamped it with my farm clamp.

For more strength I also screwed the frame.

I also glued four blocks of wood to add more strength and have a place for the back to sit on.

I designed the layout of my sign and printed it out as a template. I joined the pieces of the template and glued them on a piece of plywood with spray glue.

I drilled the starting holes on my drill press and cut out the areas I didn’t want on my scroll saw.

I used rust oil remover to remove the template.

I filed and sanded the top.

I glued the top on the base.

I flushed trimmed the top using my router and a flush trim bit.

I used a rounded rasp to make a place for the wire.

I added the led strip. I secured it by adding hot glue with my hot glue gun.

I painted the piece with two coats of red latex color and then added a couple of coats of clear satin water based varnish.

I connected all the wires with the power source and then solder it with the led strip.

I secured all the wires and the power supply in place with hot glue.

My sign is ready, all I need is pop corn and a good movie to watch!


I decided to call my home cinema “Cine Romanzo”!

Friday, February 6, 2015

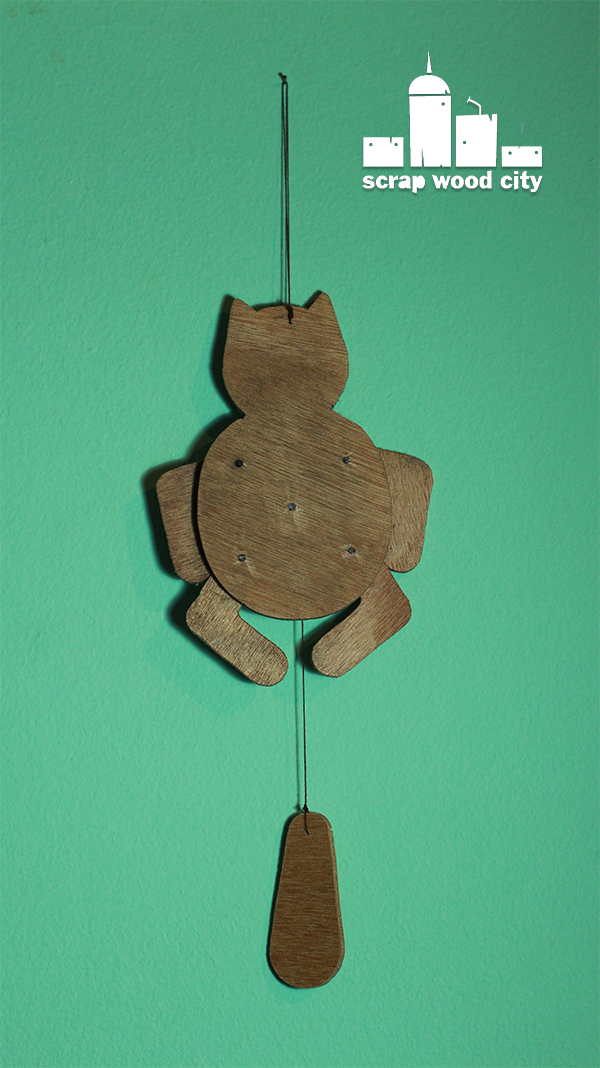
DIY moving cat toy made on the scroll saw


First of all I drew a rough sketch of my cat on a piece of paper.

Then I scanned it and imported it in Adobe illustrator.  I converted it to a vector graphic.

I printed all the parts and glued them on a piece of plywood using spray glue.

I cut out the pieces on the scroll saw.

I sprayed the glued paper pieces with rust remover, let it soak for a few minutes and the easily pealed off the templates.

I drilled the holes I needed on the drill press. Because the plywood I had was really thin, I used a clamp to hold the pieces in 90 degrees for the vertical drillings.

I sanded all the pieces.

I Joined the arms and legs with screws. I trimmed the screws flush using my rotary tool.

I joined all the pieces with string. Because making knots with such a thin string is impossible, I used my glue gun to secure everything in place.

I also added a ring in the middle for the string to be guided through.

My cat is ready.

It would be easier if you used a thicker piece of plywood. The holes would be made easier and you could use a thicker string.

But that’s what I had laying around I hope you like it.


You can download a free PDF template here.


Friday, December 19, 2014

Place a boat in a cut glass bottle


I’ve always liked miniature ships or boats in glass bottles. I guess I had to make one.

First of all I made a template of the boat and I glued it on a scrap piece of plywood.

I drilled some entry holes on my drill press for the scroll saw blade.

Then I cut the piece on the scroll saw. To remove the template, I first sprayed the piece with rust remover, let it soak for a while and then removed it easily.

I sanded the piece.

I then used my glass bottle cutting jig to make my basic cutting line. I heated the cut with a candle and then I cooled it with water. I repeated this process a few times until my bottle was cut easily.

I glued the ship in the bottle using my glue gun.

I glued the two pieces of the bottle back together using to part epoxy.

I added a small rope for decoration and for covering up the cut. I did that with my glue gun.

I made the bases using my scroll saw and a couple of scrap spruce pieces. I sanded them using a big dowel as a sanding block to sand the inner curves.


My piece is ready!


Get a free ship template here.

Sunday, December 14, 2014

How to make a pair of wooden push up handles


Those handles are very useful on doing many different exercises while keeping your hands clean.

I made them out of a scrap piece of plywood, some small dowels and a large one.

I first designed the template on a vector graphics software.

Then I used some spray mount to glue the templates on the plywood.

I drilled some entry holes for the scroll saw blade on my drill press.

I cut out the pieces on the scroll saw.

I then cut the large dowel to size, using my miter box and a saw.

I marked the depth of the plywood with a pencil and carved out some material from the dowel. This way I have a snug fit.

To remove the template from the plywood, I used a rust removing spray. I spray the pieces and let them soak for a while. Then It should be really easy to remove the paper from the plywood.

I sanded the pieces with 120 grit sand paper and glued them all together.

For extra strength, I added a dowel on the sides. I glued it and trimmed  it with my flush trim saw.


I applied a coat of teak oil and my handles are ready!

Free template here.

Monday, November 24, 2014

How to make a wooden star for the Christmas tree


First of all I designed a template for the star. You can download it here.

The two sides of the star are joined with a half lap joint. The template's inside cut is 5,4cm thick to match my plywood's thickness.

I spray glue on the template and glue it on the plywood. I then cut the two pieces on the scroll saw.

I take a scrap piece and mark the bottom of the star on it. I then I 3D cut it on my scroll saw. I drill a hole on the piece and I have my star's base ready.

Now I glue everything together.

I apply a couple of coats of gold spray paint. I also apply a coat of clear varnish.

My star is ready for my Christmas tree top!

Wednesday, November 19, 2014

My scroll saw had to be fixed


My scroll saw broke down a few days ago and I had to replace the broken part. I thought someone might find useful a video about it. At first I thought it was not going to work again. Then I found out that I can buy a new part and replace it easily.

Sunday, November 9, 2014

Make a cubistic DIY wooden flower


This is a cubistic flower made of scrap wood pieces. 

To begin with, we need to make a jig. The jig is just a piece of MDF with an equilateral triangle hole in the middle. The sides of the triangular have the same length with the end grain sides of a piece of pine I will use with the jig later. To  make the triangle first I draw a line and then another line at a 60 degree angle. Then I take the compass and measure equal lengths for the sides of the angle. I join the two end points and I have a triangle with all it’s three sides equal.  Then I cut out the triangle on  my scroll saw.

Now I take my pine piece and fit it into the triangle. It fits OK.

I mark the four points of the end grain side of my piece. I secure the jig on my vise and fit the pine piece with one angle out. I cut it with my flush trim saw. I do that for the other three marked corners of my piece.

The base of my flower is  now ready. Now I mark some points with my compass and a ruler. I mark the two sides that are at a 90 degree angle with each other.  Then I cut out the first side on my scroll saw. Then I cut out the other side on my scroll saw. For this 3D cutting the scroll saw receives much pressure so you need to have a fairly big blade and slow speed on it.

Our 3D flower is ready. For the stalk of the flower I use a dowel which I bent with water and heat. Be careful if you do that and take all the necessary safety precautions. I scrape off the burning marks with my utility knife.

For the flower leaves I cut some of my pyramid scraps with a chisel and a blow with the direction of the grain.

I create some wood savings with my block plane for the inner flower part.

I use the  scrap pyramids from the first cut as cubistic rocks for the base of the flower.

I assemble everything with hot glue.  


My flower is ready. It has a low polygon 3D look which I like.