Monday, September 28, 2015

DIY experimental wooden logo stamp


I had this idea on experimenting printing with a DIY custom stamp.

I first cut out my logo reversed out of 4mm plywood piece. I used my CNC machine to do that. I used the smallest cutting bit I had for the printing matrix. I changed to a bigger bit to cut the circle around my matrix.

I then cut out the handle and the base of my stamp out of 18mm plywood.

I clamped my router upside down on my vise and with a round over bit, I rounded the edges of the handle and the base. 

I then glued everything together using wood glue. The handle and the base connect with a mortise and tenon joint. I also used clamps during glueing.

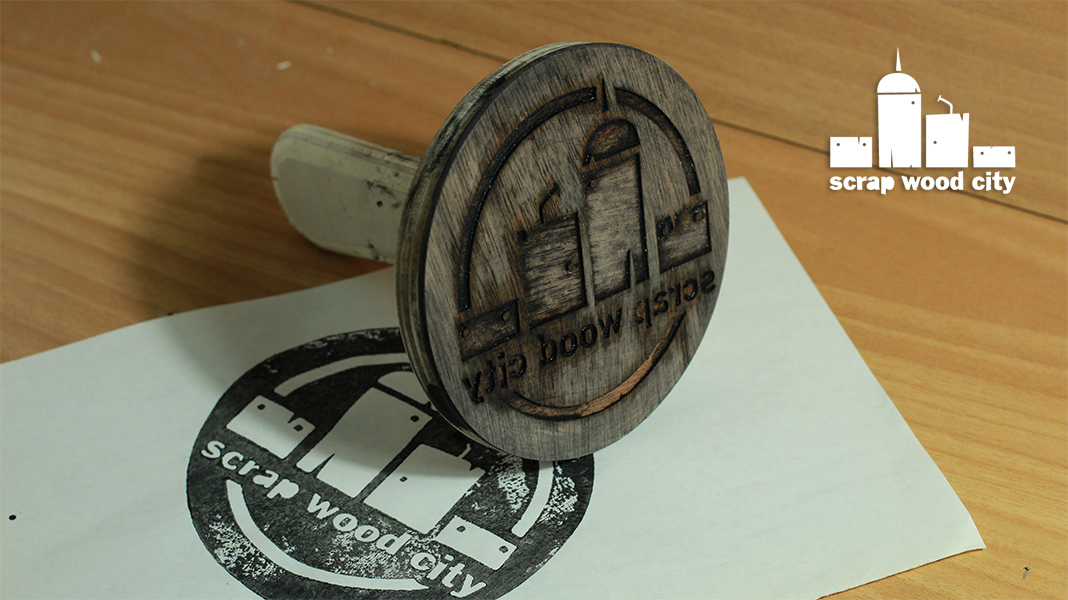
To test my stamp I used acrylic black paint with a bit of water. I used a roller to apply the paint on the stamp. I added a sheet of paper of a piece of leather and pressed on with my stamp.

The first printing proofs were not that good, but after a while the print outs were coming out all right.

I like the stumpy look I get from the stamp’s defects. 


I think it was fun making something like that!

Friday, September 18, 2015

10.000 subscribers, 10.000 thank you!


Recently, Scrap wood city youtube channel, reached 10.000 subscribers. I created this video to thank you all for your support! 

Tuesday, September 15, 2015

How to make a light bulb shaped, wooden lamp


Recently I came up with the idea, of making a light bulb shaped lamp. I designed the paths of my lamp in illustrator and then I used my CNC machine to carve the lamp, out of an 18mm (thickness) piece of plywood.

After the piece was done, I used an exacto knife to cut the little wood pieces that hold everything together and sanded the whole lamp with 180 grit sand paper.

I cut the led strip to length and soldered everything together. 

I then attached the strip on the lamp using it’s own adhesive.

I connected the wires with the power supply. It is important to ask your electrical supplies retailer in order to use the correct power supply, depending on the leds you will use.

I secured the wires in place with hot glue.

I hanged the piece on the wall, plugged it in and my lamp was ready.

Friday, September 11, 2015

DIY 3 color wooden stencil with the CNC


I wanted to  make a wooden stencil with my CNC machine. So I took an image, adjusted it’s levels in photoshop and then created the vector shape I wanted in illustrator.

I also added some elements in my image, so that no forms will not fall apart when the stencils will be cut.

I created three stencils one for each color. The stencil acts like a mask. So when you spray paint over it, you create the image that the mask does not hide.

After I was done with the design, I let my CNC machine to cut the stencils out of a 4mm plywood piece. Since my design is pretty complicated,  I used the smallest cutting bit I had on my CNC router.

When the CNC finished, I removed the stencils using an exacto knife. I clamped the stencils on a piece of plywood and started spraying. I begun with the red color, then the black and lastly white!


I think it worked out pretty nicely!

Saturday, September 5, 2015

Assembling, testing and reviewing the inventables X-CARVE CNC machine!


A few months ago Inventables sent me their X-CARVE CNC machine , in order to assemble it, say my opinion and make a video about it.

I accepted the challenge and as soon as all the parts were shipped to me I started the assembly.

They have very analytic instructions to their page, on how to assemble the machine step by step.

I assembled the X carriage, the Y-axis plates, the gantry, the Y-axis, I added the belts, assembled the Z-axis, the drive rod, the Z-axis motor, did all the wiring, added the drag chain, the spindle mount, the work area and the electronics.

The whole process was pretty new to me but everything worked out fine eventually. A very interesting part was the arduino. It was my first meeting with that electronic device and it was really nice to hold it in my hands.

After testing the machine, I made a test carve using easel which is a free 3D carving software provided by Inventables.

My whole experience with the CNC was awesome, but if I had to say something I didn't like about it I would say that I found two things:
a.) It is a bit slower compared to old fashion power tools.
b.) Easel has limited capabilities at the moment.

Overall, I loved the X-CARVE and I think it will lift my DIY and woodworking projects to a whole new level.

I want to really thank Inventables for sending me that awesome machine. I hope in future I will put it in good use!