Thursday, October 30, 2014

Make two baby Maracas using the 3D scroll sawing technique


This is a pair of baby rattles made of 2 pieces of scrap spruce. It is made using the 3D scroll sawing technique. It is a technique thats involves cutting with a scroll saw in more than one dimensions.

First of all I make my pieces square by planing them with my block plane. I secure the piece on my bench using clamps and a wedge.

Then I draw the basic shape of my maraca on the two sides of the piece.

First I cut the piece in half. It is easier to do that now.

Then I cut the exterior pieces. I keep the cut outs and clamp all the pieces together with tape.

I make the cut on the other face of the piece.

I have my basic shape ready. I draw the inner line of the maraca before hollowing it.

I secure the pieces on the bench using the scraps of the cut and clamps. I hollow them out using my curved chisels.

I stop the carving when light can pass through the piece. This technique is also used in spoon carving.

I add some nails to create the rattle noise and glue and clamp the pieces together. I use the cut out scraps to clamp the pieces easier.

I add a decorative touch by wrapping the maracas with some twine. 

My baby rattle is ready!


Wednesday, October 29, 2014

Another DIY log box


Actually Ι've made a similar box in the past. But I had not made a video of it. For more info about this project go to my past blog article.

Thursday, October 23, 2014

Scrapy spends Halloween in a nail coffin


The iron maiden torture now becomes the scrap wood maiden. Scrapy just couldn't miss it!

Wednesday, October 22, 2014

DIY pixel face wooden pencil holder


I made this this holder from a scrap piece of pine.

First of all I cut the bottom of the piece. Then I cut one side. I continue by making two parallel cuts on the sides. Those last cuts do not go all the way.

Then I take my chisel and easily remove material with the direction of the grain. This way I hollowed the body of the piece.

Now I glue all the parts together and apply clamp pressure.

I fine tune the meeting points with my chisel.

I draw the facial characteristics on a scrap piece of plywood and cut them all on my scroll saw.

I glue them up. I apply pressure with a weight.

I fill the gaps with glue and wood dust by sanding over the glue. I sand the whole piece.

I apply a white base color to the piece.

I paint it black.

I wanted the facial characteristics to have a swirly look. So before the black dries completely I applied the green color. This way the two colors mix a little bit.

After the piece is dry, I apply 2 coats of clear satin water based varnish on it. To make things a little easier I made a base using hot glue and screws. This way I don't have to wait for the bottom to dry, before I varnish the rest of the piece because the piece can sit on it.

My pencil holder is ready.

Saturday, October 18, 2014

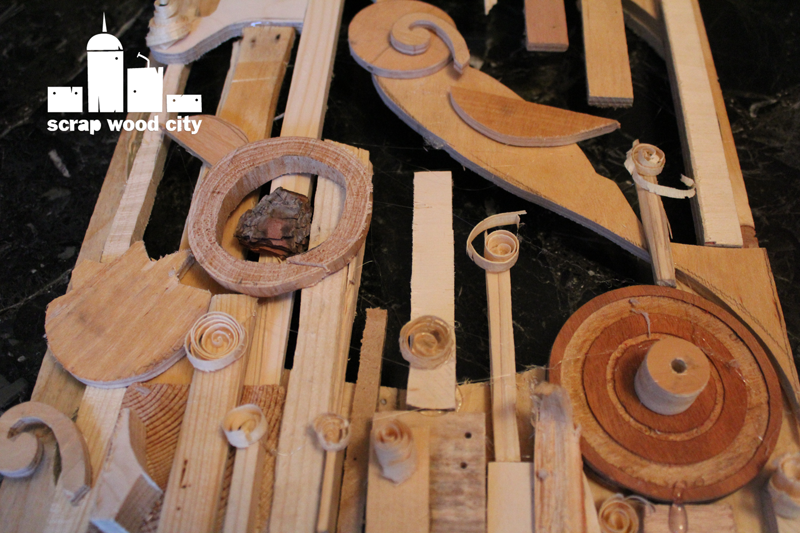
Scrap bin challenge and improvised wooden art piece


I made this piece just by gluing scrap pieces of wood with my glue gun. I didn't cut, broke, sand, nailed or chiseled any of these pieces. I just tried to make something we the pieces I had.

Scrap bin challenge is a challenge in which you tube woodworkers participated. You can view some other participants projects here:

April Wilkerson
https://www.youtube.com/user/AprilWil...

Steve Carmichael
https://www.youtube.com/user/carmicha...

Peter Brown
https://www.youtube.com/user/kludge1977

John Heisz
https://www.youtube.com/user/jpheisz

Fr. Thomas Bailey
https://www.youtube.com/user/monk1998

Dominic Bender
https://www.youtube.com/user/Dominics...

Manhattan Wood Project
https://www.youtube.com/user/Manhatta...

Arzensek Andrea
https://www.youtube.com/user/Arzensek...

Steve French
https://www.youtube.com/user/blockyimage

Jason Rausch
https://www.youtube.com/user/rauschww

AdventuresInDIY
http://www.youtube.com/user/Adventure...

Fabian's Tiny Workshop
http://www.youtube.com/user/swingguit...

Nick Ferry
https://www.youtube.com/ferrynick


Richard Morley
https://www.youtube.com/user/Trende1978

Patrick's Work Shop
https://www.youtube.com/user/Patricks...

Darbin Orvar
http://www.youtube.com/user/darbinorvar

Rock-n H Woodshop
https://www.youtube.com/user/rhwoodshop

The Nomadic Polywright Show
http://www.youtube.com/user/johnzzhu

McGinn's WoodShop
https://www.youtube.com/user/McGinnsW...

Jack Houweling
https://www.youtube.com/user/Jacka440

Mike Fulton
https://www.youtube.com/user/mfwoodshop

Ted Alexander
https://www.youtube.com/channel/UCGcD...

Average Joes
https://www.youtube.com/user/AverageJ...

ChefwareKits
https://www.chefwarekits.com/?trackin...

Carl Jacobson
https://www.youtube.com/channel/UCirY...

Tuesday, October 14, 2014

Make a wooden animation toy out of scrap wood


This is the classic "put the bird in the cage" game. One side has the bird and the other has the cage flipped. If you turn the disc fast, the brain takes the two images as one and as a result you see the bird inside the cage.

First of all I design my half basic shapes on a heavy piece of paper. 

Then I cut the paper and use it as a template on a scrap piece of plywood. After I draw one side, I flip the paper over to trace the other side. 

Then I cut the pieces on the scroll saw.

I sand with 120 grit sandpaper.

I drill the holes in the drill press.

I assemble the piece joining everything with a thin dowel.

I draw the cage with my pyrographer and then I flip the piece and draw the bird.

My piece is ready.

Saturday, October 11, 2014

Another rustic key rack for DIY lovers!


Another wooden key rack I made out of a couple of scrap pine boards and iron scraps I had laying around.

First I cut the metallic pegs that will hold the keys. I do that with my dremel tool and metal cutting bits.

Then I secure the pieces on my vise and I use a file to smooth the edges, I also round them over a little bit.

I drill the holes for the screws on my drill press using special bits for metal and oil to cool down the iron while drilling. I use a bigger bit to create a cone for the screws heads to sit in.

Then I mount the pieces on my vise and using a hammer and cylindrical object ( I use my mallet) I bend the iron pegs to the shape I want.

The main body of the rack is made of two wooden pieces joint together with glue and dowels. I drill the holes for the dowels on my drill press and use my copper pointers to find where exactly I need to drill the holes on the opposite board.

I glue and apply some pressure with a couple of clamps and let it dry for a couple of hours.

Then I round over the edges on the scroll saw.

I use my micro carving chisels to carve the word home. I start by making stop cuts and then I slowly remove wood material with the direction of the grain (when possible).

I also carve out the holes for the pegs to sit on.

I apply a coat of primer on the pegs and screws. Then I apply a coat of high gloss black spray paint.

I use water based wood stain (walnut color) on the wood. I sand only the letters with 120 grit sand paper to give the rustic look.

I screw the pegs on the rack and my piece is ready for action.

I used a small hanger to mount it on the wall.

Wednesday, October 8, 2014

Scrapy had a nightmare!


This time Scrapy didn't sleep well! To much woodworking before sleep! Who knows!

Monday, October 6, 2014

My wooden mechanical helicopter toy


My little mechanic helicopter. I made it out of some scrap pieces of plywood and dowels.

First I cut two round shapes for the gears. I do that with my hole saw bit.

Then I cut the pieces for the box on which the helicopter will sit. I join them with dowels and glue. I cut the dowels flush with a trim saw.

I draw the basic shape of the helicopter and it’s helix on a piece of plywood. For the helicopter’s body I glued two pieces together to have some more mass. I cut them out both on my scroll saw.

To make the gears I divide them  in eight and  drill them on my drill press. I join them with a dowel and drill all the holes at once to both of them. When I make the first hole I add another dowel to secure that nothing will move while drilling.

I cut the handle on the scroll saw. I secure the dowels on it by adding a small nail and glue. I do the same thing with the helix.

I mount the helicopter on the box with dowels.

I secure the gears on the dowels with a screw and no glue, in case I need to remove them in the future.

I fine tune the dowels diameter with a knife. This way they fit loosely enough.

I assemble the rest of the parts and my toy is ready.

Saturday, October 4, 2014

DIY wooden Lego head style candle holder


I had a scrap piece of pine laying around, and I decided to make a Lego head style candle holder.

First of all I cut the wood to the size I want. I find the center of the two ends by making diagonals.

I roughly draw the basic shape of the head and then use my caliper to draw circles for the upper and lower parts of the head.

To cut those parts I first cut tenons. To cut the tenons I first mark their size with a pencil. I secure the piece on my wise and cut the tenons.

Now I round over the edges with my hand plane. Then I round over the tenons with a chisel.

Time for more rounding over with the block plane. This is a pretty easy job because I move the plane with the grain of the wood.

I use a spade bit on my drill press to open the hole for the candle.

I use my chisel for more rounding over against the grain of the wood.

I sand the piece with 120 grit sand paper.

I use my wood burner to draw the eyes and the mouth.

My candle holder is ready.