Showing posts with label mechanical toy. Show all posts

Monday, April 22, 2019

Making a simple Easter bunny mechanical toy, out of plywood!


Tools and materials I propose:


Happy Easter everybody! This is a simple woodworking project out of 9mm birch plywood. I hope you'll enjoy it!

I begun by making a rough prototype out of OSB. I then created vector templates for the project. 

Mechanical toys require accuracy in order to work. So I also created a 3D model as a simulation. Everything seemed to work.

Next I layed out my templates on the plywood, based on the orientation of the grain. 

I coated the plywood with a layer of packaging tape. I attached the templates on the plywood using spray adhesive. Finally I added a coat of tape over the templates. This technique helps keep the templates in place while cutting. Also the templates can be removed really easily without leaving glue on the wood. To me this is the best method for attaching templates onto the wood.

At this point  I center punched all the holes.

Next I cut everything on the bandsaw. To cut the smaller parts safely, I added an improvised zero clearence insert on the bandsaw. 

I then sanded everything close to the template lines, using my belt sander. I used a chisel to reach some difficult spots. 

I drilled all the holes on my drill press. I then glued and nailed a few parts in place.

I connected the parts of the egg cell with two screws and sanded them flush on the belt sander. 

The bunny should fit loosely, so I sanded it a little bit.

As a shaft, I used an 8mm dowel. 

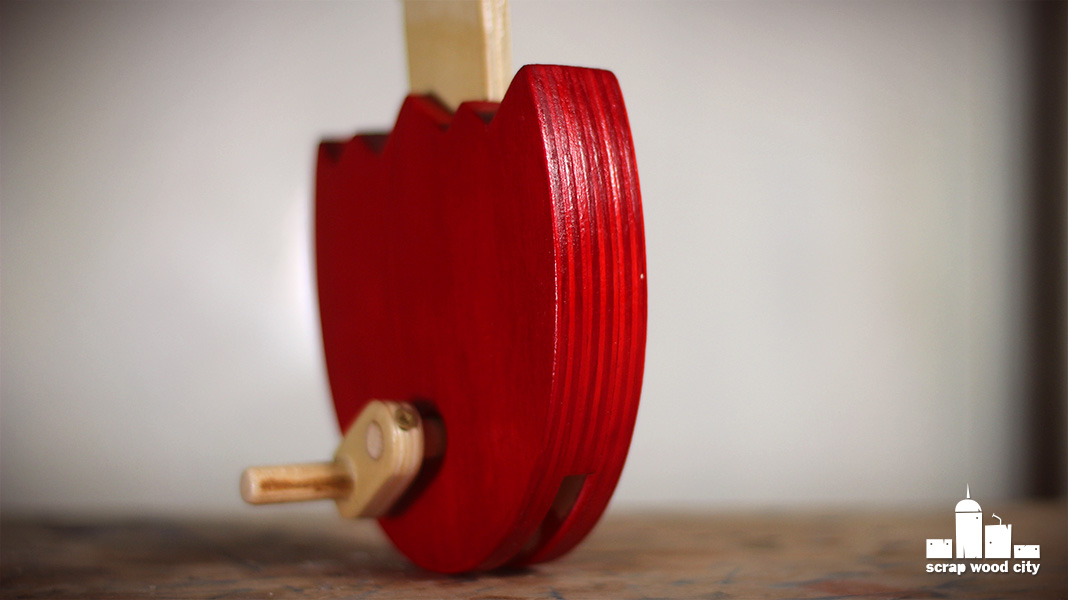
I stained the egg with water based dye. This has a vivid color but also leaves the grain pattern of the wood visible.

I then finished everything with water based clear varnish. 

I also lubricated the inside of the egg with my homemade beeswax and mineral oil finish.

Finally I glued the crank’s pieces in place. The leaver was secured in place with a screw, so I can remove it if I have to. 

And that was it. My little Easter bunny toy was ready.

I hope you enjoyed this video. Happy Easter everybody, see you soon with a new project video!


Disclosure: Some of the links below are affiliate links, meaning, that at no cost to you, I get a small commission if you click through and make a purchase.

Thursday, September 14, 2017

How to make a mechanical worm toy out of wood


I made this toy out of scrap pieces of spruce, pine and plywood.

First of all I cut the frame pieces to size using my table saw and a cross cut sled.

I decided to join the frame pieces using finger joints. I made a simple jig for my cross cut sled to make accurate repeatable cuts. I do not have a dado blade so I made single blade box joints.

I then glued the frame together. 

I turned a scrap pine cylinder to size on the lathe. I then turned eight small wheels on it using a straight chisel and a spindle gouge. I then cut the wheels on the table saw and sanded them flush on my disc sander.

I then used my center finder and located the centers of the wheels. I then drilled an off center hole to each wheel. 

I moved to the lathe again and used a bowl and a spindle gouge to turn the worm. 

I cut the worm in half and then mounted each piece on the chuck to finish the turnings. I removed the last part using the spindle gouge and a skew chisel.

I then sanded the frame with my orbital sander. I filled any gaps of the finger joints using saw dust and glue.

I then drilled the holes on the frame. To prevent the wood from splitting I clamped a piece of wood from the back side.

I marked the hole positions of the worm pieces with an owl. I secured the pieces in a plywood piece with a large inner hole. I then used the drill press to drill the hole.

I wanted the toy to have removable parts. So I opened up the holes that receive the rod with a saw. I then added removable stoppers to prevent the rod from moving around!

I made a template for the pieces that climb on the wheels and cut them on the bandsaw out of plywood. I sanded them with my rotary tool and a sanding drum bit. 

I then started glueing and assembling all the parts. 

I also added two dowels to act as the worm’s antennas. I jointed the worm with the mechanism using bamboo sticks.

I fine tuned the wheels and my little worm was ready to roll.

It still needs a few adjustments but overall it is pretty fun to play with! 


Thursday, July 21, 2016

How to make a DIY animation toy


I made this classic “put the fish in the bowl” toy, using scrap plywood pieces and a dowel.

First of all, using a compass and a ruler, I designed the handle of the toy. 

I used my hole saw to cut the circular parts and then cut the rest on the bandsaw.

I used my drill press to drill the holes that would receive the wooden dowel. 

I sanded the piece. I also rounded over the edges with sand paper. I used a marker as a sanding block, to sand the round parts of the piece.

I then again used the hole saw to cut out a ring. The inner circle of the ring was cut out on the drill press for more accuracy.

I then cut the ring to the appropriate thickness on the bandsaw using also it’s fence. I used a pencil to keep my fingers away from the blade.

I then cut a piece of dowel and created a small hole on it, on the drill press.

I designed another circle, drilled a small hole in the middle and added a small nail on a piece of MDF to act as a pivot point. I used this quick and dirty circle making jig to cut that circle on the bandsaw.

I then cut a notch on the circle using the bandsaw and glued the dowel in there.

I applied a coat of white surface primer to everything. After drying I sanded the pieces and added a another couple of coats.

In the first side of the circle I drew a minimalistic fish symbol and on the other I drew a circle.

I added string in the spindle and attached it to the ring.

At this point my toy was ready. 

In order for the toy to work you have to rotate the spindle in order for the string to be wrapped around it. Then you pull the ring and the spindle starts to spin fast. 

The toy is based around a principle of the human vision called “ metaisthima ”. With the speed of the rotation the brain sees the image of the circle and the fish as one. As a result you see a fish in the circle.


I hope you like that project.


Wednesday, May 11, 2016

How to make Scrapy, my wooden animated puppet ( quick and dirty )


First of all I have to say that Scrapy should always be made out of scrap wood.

I made this one using a piece of 2x4 and a scrap kind of 1x1 I had laying around in my woodworking shop.

I begun by rough sketching the basic idea of my character. I then use a piece of paper to cut out the templates for half of my design. Scrapy’s front view is symmetrical. So all I have to do is create templates for one side and then I flip them over to draw the other one.

I then transferred my templates on wood, and cut them out on bandsaw.  

To join the foot I need to cut a mortise. To do that I used the tenon and mark my cuts. I completed the task on the bandsaw again. 

I then rounded all the parts I had to, with my belt sander.

All the parts are screwed together. Before that I made pilot holes with my rotary tool, to avoid wood splitting. I also added two nuts between the legs and the body to act as spacers. 

The eyes and ears of Scrapy are just screws.

I made a hole on the head on my drill press. I glued in a dowel and that’s my head and neck.

To join the head with the rest of the body, I just drilled a hole and placed the head in without any glue.


My little wood buddy is ready. I hope you like him!


Saturday, April 2, 2016

DIY spring powered zombie apocalypse toy rifle


I made this arrow throwing rifle out of plywood, a couple of springs and scrap metal parts.

First of all I cut a piece of 18mm plywood using my circular saw and a guide rail.

I then designed my rifle with a marker.

I cut the basic shape on my bandsaw.

I used several scrap metal parts for this build. I also used a few metal corners I had laying around. I cut them all on the bandsaw while first spraying WD-40 to be safe from overheating and blade burning.

I made all the holes using my drill press or my power drill free handed.

For the trigger mechanism, I made a mortise. I made several holes with my drill press and used a sharp chisel to clean it up.

I assembled everything using screws, nuts and bolts. Butterfly nut are pretty handy in this situation.

All the power of the toy comes from two springs which I up-cycled from an old desk lamp.


My zombie apocalypse rifle throws arrows and it is ready for fun!


Sunday, July 26, 2015

How to make a wooden toy boat


I wanted to make a summer project. I wanted to be fun and if possible to combine playing in the sea. So I made this toy boat out a few scrap spruce pieces and an oak dowel.

First of all I designed a template, glued it on the wood with spray glue and cut it out on my scroll saw.

For the propeller of the boat I planed down a wood piece. To do that I clamped my plane upside down on my vise.

I joined the two pieces of the propeller with a half lap joint.

To sand the pieces I used 80 grit sand paper and my metal ruler in order to sand the curves of the boat.

Then using a round over bit on my router I rounded some of the edges.

Using a conical bit I made a bevel on the bottom of my boat.

I glued everything together using two part epoxy, because it is water proof.

I made a jig to cut the dowels to the same height, using my flush trim saw.

I wood burned the name of my boat.

I finished the piece with 9 coats of polyurethane varnish while sanding between coats. I used 2/3 poly and 1/3 thinner for my mixture. I did that because I wanted my coats to dry pretty fast.


After everything was dry I added a rubber band on my propeller and my boat was ready!


Free plans for the boat here.