I made this coffee table out of an old metal planter base, some pallet wood and a piece of 9mm plywood. It's kind of semi rustic and I think it is ideal for having it outdoors on your garden or balcony.
I begun by cutting some excess metal from the planter base using the angle grinder. I then cut four square pieces of steel. These would help me screw the table top on to the base.
I started removing the paint with a sanding disc. But then I decided to use paint remover. I applied the remover and let it sit for a while. Then I scrapped the paint off with wire brushes.
At this point I stick welded the four square pieces on the base. I welded two points at first and then I finished the seam. I welded the pieces from both bottom and top sides.
I cleaned the welds with a sanding disc and then I drilled the holes for the screws.
Finally I painted the piece black with two coats of oil paint.
Now for the woodworking part. First I drew a circle on a piece of plywood. I drilled the centre and then drew another circle on it’s back.
I used the router with a straight bit and circle cutting jig. I cut the plywood circle.
Then I used the table saw to cut my pallet wood to size. I then glued and nailed the wood on to the plywood. I used the bandsaw and a jigsaw to cut the excess pallet wood off.
I used the circle cutting jig again to to remove some more pallet wood. Then I trimmed everything flush with a flush trim bit. I did that because my bits were sorter than needed to do the job at once.
I cut some thin pieces of spruce on the table saw to cover the end grain. Then using glue and flat headed nails I bended the pieces to place.To avoid splitting the wood, try not to add the nails in a straight line. To the points were two pieces connected I tried to place the nail in the middle. This way the nail’s head forced the wood in place. Just to be sure I clamped the piece with a band clamp and let it sit over night.
I then used a block plane to plane the edge band flush.
I then sanded the piece. I tried to leave as much pallet look as possible. This wasn’t supposed to be super clean.
Finally I applied four coats of clear water based varnish and then screwed the top on the base.
I am really happy with the way it came out. I think we are gonna enjoy this table on summer. But that was it. See you soon with a new project video.
Disclosure: Some of the links below are affiliate links, meaning, that at no cost to you, I get a small commission if you click through and make a purchase.
In this video I restore a bar stool I found in the garbage. The stool is made out of solid beech wood and MDF. It was an interesting project and I learned a lot of stuff in the process.
I begun by stripping the wood out of the old paint jobs. I used my heat gun and a spatula. This worked but it was a bit slow. So I used some paint stripper gel to remove the paint really fast. But be careful when using this stuff because it is really toxic.
I also used the heat gun to melt the glue in all the joints in order to break the whole thing apart.
To clean the paint I also used my random orbit sander, chisels and my rotary tool at really slow speed and a sanding bit.
The stool’s top had a big hole. I filled the hole by shaping a spruce dowelto size using my table saw.
I filled all small cracks with super glue and wood dust.
I gave the top a round over using my spoke shave and sand paper.
I glued the stool back together in stages. First I glued the two pairs of it’s legs, Then I glued the legs together and finally I glued the legs on the top. This made things much easier.
Finally I masked the legs and painted them and the top deep red with latex paint. I applied two coats in total. The heat gun helped me speed up the drying process.
Finally I finished the piece with two coats of clear, water based, satin varnish.
My stool came out great and I learned a ton of stuff trying to restore it. But that was it, see you soon with a new project video.
Disclosure: Some of the links below are affiliate links, meaning, that at no cost to you, I get a small commission if you click through and make a purchase.
Making your own training equipment is really fun. I made two dip bars out of reclaimed pine and a 40mm spruce dowel.
I begun by glueing three boards together for each leg. I used another board as a spacer. I used nails to secure the pieces in place while the glue dried out.
I then cut all the pieces to length on the table saw. A circular saw and a speed square works just as well.
I then made a quick jig so I can easily mark the dowel’s position on each leg. This also helped me to avoid measuring. I then used a 38mm spade bit to drill the hole for the dowel. To avoid tear out I drilled the hole from both ends.
I then rounded over the bases of the legs on my belt sander. You can also use a saw and a sanding block.
My dowel was 40mm and my largest spade bit was 38mm. So I came up with a smart set up, so I can reduce the size of the dowel’s ends on the table saw. You can also go old school and use a saw, a chisel and a file to do that job.
At this point I sanded all the parts. I also broke the edges with my block plane.
I added screws on the legs for extra strength. I first predrilled pilot holes and I counter sinked them.
I then glued and screwed the bases in place.
To make sure that the legs are perpendicular to the dowel I made a spacer to help me glue the dowel straight.
I then glued and screwed two braces close to the bases, to keep everything nice and strong.
Finally I cut the dowels flush with a saw. I used a piece of masking tape to prevent the saw blade from damaging the wood.
My dip bars came out great. Now it’s time to do some chest exercises. But I hope you liked this one, because that was it. See you soon with a new project video.
Disclosure: Some of the links below are affiliate links, meaning, that at no cost to you, I get a small commission if you click through and make a purchase.
I made this lightbox out of pallet wood, plexiglass and LED strips. It is ideal for tracing images. You can also use it to create hand drawn animations.
First of all I cleaned my wood with a wire brush and my random orbit sander. I then flattened two edges of each board with my jointer. I passed the boards
through the thickness planer and finally I finished squaring up my material on my table saw.
I set up a stop block on my cross cut sled and made the butt joints of the box. I then glued and nailed the box sides. I also used a picture frame clamp.
Next I glued and nailed the cleats in place. Those cleats would hold the milky plexiglass top. I cut the plexiglass to size on my table saw.
The bottom was just a laminated MDF piece which I also cut on the table saw.
I glued and nailed the bottom in place.
To solder all the electric parts I first coated everything with solder. It was then easy to join the jumper wires with the LED strip contacts. I connected the pluses with the pluses and the minuses with the minuses. I also added a dimmer and a power supply. I secured the LED strips in place with my hot glue gun.
Using a forstner bit I opened up a hole for the cable. I created a knot with the cable so it can’t get pulled out. I screwed the dimmer and the power supply in place and connected them with the rest of the circuit. I also added some heat shrinking tube to keep the wires nice and tidy.
At this point my light box was ready. It is really useful for tracing images for illustrations. But the most fun part is that you can use it to create hand drawn animations.
But anyway, I hope you liked it, because that was it, see you soon with a new project video.
Disclosure: Some of the links below are affiliate links, meaning, that at no cost to you, I get a small commission if you click through and make a purchase.
I made my little chair out of reclaimed pine lumber. You can use pre planed clean lumber, straight from your lumber yard.
First of all I had to make the wood useable again. I first removed any nails. Then I cut it roughly to size with my circular saw and a speed square.
I then ripped the boards to width on the table saw. I squared all the ends with my cross cut sled. Finally I passed all the boards, through the thickness planer.
I then started designing my chair. I made all the cross cuts on the table saw. You can also use a miter box and a hand saw. I cut the angled parts on the bandsaw and then sanded them on the belt sander. Alternatively you can use a chisel and a hand plane and achieve the same result.
I then cut the side pieces. I used 8mm dowels to connect all the parts together. I first named all my joints. Then I drilled the first holes, added the center pins and then drilled the matching holes.
I then glued the sides of my chair.
I used a washer as a guide to draw curves on the edges. I then rounded over the edges on the belt sander.
Next I had to cut some notches for the back rest. I used the bandsaw to do that. Alternatively you can make a series of cross cuts and then remove as much material as you can with a chisel. In both cases finish the job with a sanding block.
Then I cut the cleats on which the seat of the chair rests upon. I did that on the table saw. I glued them in place and added dowels for extra strength. I cut the dowels flush, with a flush trim saw.
Finally I glued the main body of the chair together. Again using 8mm dowels.
On the table saw again, I cut the pieces for the seat and the back rest.
I glued and nailed the seat pieces in place. I had a small gap which I filled with a thin piece. I used a block plane and a chisel to trim it flush.
I filled all the imperfections with wood filler.
Finally I started sanding with my random orbit sander. Once I sanded most parts I glued and nailed the back rest in place. I also used screws here. But first I drilled pilot holes and created counter sinks.
I finished sanding.
To make the chair sit nicely on a flat surface I glued a shim on one leg. I trimmed it flush with a chisel and sandpaper.
I then masked the areas around the back rest and the seat. I painted with latex paint. It is important to paint from the tape to the wood in order to achieve really sharp edges. I applied two coats while lightly sanding between coats. The heat gun helps to speed up the drying process.
Finally, I finished my chair with two coats of clear water based varnish.
At this point my chair was ready. It came out great. The only thing I would change is the screws on the back rest. I thing dowels would do just fine.
Anyway, I hope you liked my little chair, because that was it. See you soon with a new project video.
Disclosure: Some of the links below are affiliate links, meaning, that at no cost to you, I get a small commission if you click through and make a purchase.
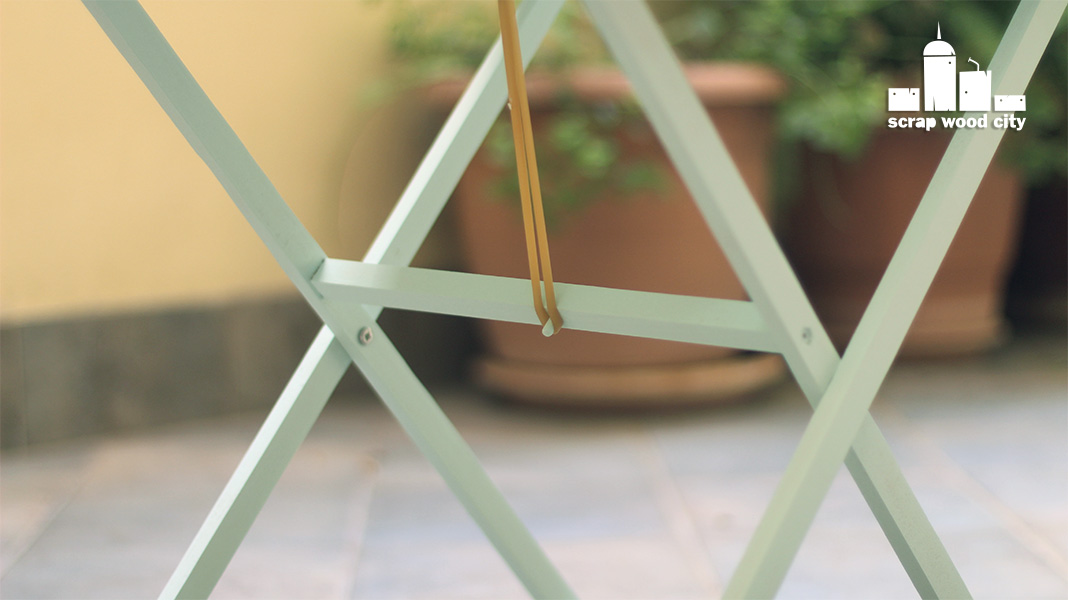
I had this old IKEA laundry basket and I decided to convert it into a folding camping table. This seemed like a cool idea, because the basket had a folding mechanism already.
First of all, I used my random orbit sander with 80grit sandpaper to quickly remove the old paint. To sand the spindles I mounted them on my lathe and sand them there. I used masking tape to prevent the chuck jaws from harming the wood.
I had a spruce piece to act as a table top but I needed it to be larger. So I cut an extra piece on my table saw. I used biscuits and glue to complete the table top. The biscuits prevent the pieces from moving around while glue up.
After the wood glue dried I trimmed the edges of the table top, using my circular saw and a guide rail. Because these were cross cuts, I used masking tape to reduce the splitting of the wood.
I then used a roll of tape as a guide to create the rounded edges. I used the bandsaw to cut the curved corners and finished the shaping with a sanding block.
After sanding the table top flush, I used my router with a round over bit to round over all the edges of the top.
I then marked the positions of the cross braces. I cut the braces on the table saw and glued and nailed them in place with my nail gun.
I then made another piece. I cut it’s shape on on the bandsaw. I sanded it on the belt sander.To sand a few tight curves I used a drum sanding bit on my drill press.
I then predrilled pilot holes, countersinked them and added the screws in place.
I also added a piece of rubber and a hook to make a spring mechanism to keep the table pieces secure in place. This mechanism works both in the closed and open position of the table.
I then disassembled the pieces and I was ready for the paint job. I mixed white and green latex paint to get the color I wanted. I then applied two coats of paint to everything while sanding between coats. I applied the paint mostly with a roller, although I used a small brush to cover a few difficult areas.
My table was now ready. It is really light weight and I think that makes it ideal for camping or barbecue situations!
Recently I found a broken washing machine drum. I got the idea to make a contrabass using the drum and a spruce 2x4.
First of all I used my drill with a wire brush bit to clean all the salts and dirt.
I then used my angle grinder to grind of the heads of the rivets that hold the flanges in place. I then used an old chisel to remove the flanges.
With the angle grinder I opened up the holes on the sides.
I removed the little doors and bended the sharp sheet metal edges with a pair of pliers to make the piece safer.
Using my jigsaw I cut the basic shapes out of a 2x4.
I then created two grooves with my a handsaw and a chisel. Those would receive the edges of the drum.
The contrabass is standing on a tapered foot. I marked a circle at the end of the 2x4 and used my draw knife to remove much material. I finished the job with a spokeshave.
I then marked the center of the fingerboard. Again I used the spokeshave to shape the back of the neck. The spots that couldn’t be reached with the spokeshave, I shaped using rasps and files. I use the rasp to remove much stock fast. The I use a less aggressive file to remove the rasp’s marks.
I planed the surface that would receive the fingerboard flat with a plane.
Using the table saw I ripped cut the fingerboard.
To avoid the fingerboard from sliding around while glue up. I used two small nails to keep it in place. I then glued the fingerboard in place using glue and clamps.
I then planed the sides of the fingerboard flat using a hand plane.
I sanded everything with 100grit sandpaper and finished shaping.
To sand the fingerboard flat, I used a flat foot from an old IKEA table as a sanding block. Using double sided tape I glued a piece of sandpaper on it.
I broke the sharp edges using my block plane.
I drilled the holes for the tuning pegs. I also predrilled pilot holes and secured the pegs in place with screws.
I clamped the wood temporarily on the washing machine drum, to mark the locations of the holes I had to make. I actually took advantage of the existing holes of the drum. I only enlarged them with my drill.
I secured the wood on the drum with four ball headed screws. I also predrilled holes to avoid spitting of the wood.
Using a handsaw and a small file I opened up a groove that would receive the nut bone.
Using a sanding disc on my angle grinder, I flattened the area that would receive the bridge.
I then made the bridge from a scrap piece of walnut wood. I cut it to size on the bandsaw and shaped it with my disc sander.
I predrilled pilot holes and screwed the string guides in place.
Using a small file I opened up the slots on the nut for the strings.
I then measured my string’s length from nut to bridge. My scale was 87cm. I used an online fret calculator to divide the fingerboard. I first used a pencil to mark the fret positions temporarily. I used my pyrographer to burn the marks permanently.
At this point my bass was ready. It has a cool metallic sound. I am really happy with the way it came out, I hope you like it too.