


I wanted to make a beehive, for some time now. Finally a friend ( and bee keeper ) brought me an original beehive so I can measure it and make my own version.
First of all I need to make a couple of solid wood panels. To do that I joined spruce boards using my biscuit jointer, biscuits and glue.
I then cut the panels roughly using my circular saw. I also used my table saw to cut the sides of the beehive to size. For the cross cuts I used my homemade sled.
Using a block plane I cleaned any excess glue drips. I also used my orbital sander.
The sides of a beehive are traditionally joined with box joints. To make them I first used the boards themselves to mark the depth of the joints. I then marked the pieces I wanted to remove and made the first cuts on the bandsaw. I then used a sharp chisel to fine tune the cuts.
I used the first side to mark the other one and repeated the process. It is important to have a very sharp chisel because your cutting end grain here. It is also important to make the cuts with the bandsaw leaving enough material to remove with the chisel. This way you can achieve a nice tight joint.
On the two sides I made a groove for the frames to sit. To make the groove I made repeated cuts on the table saw, while moving the fence back after each cut.
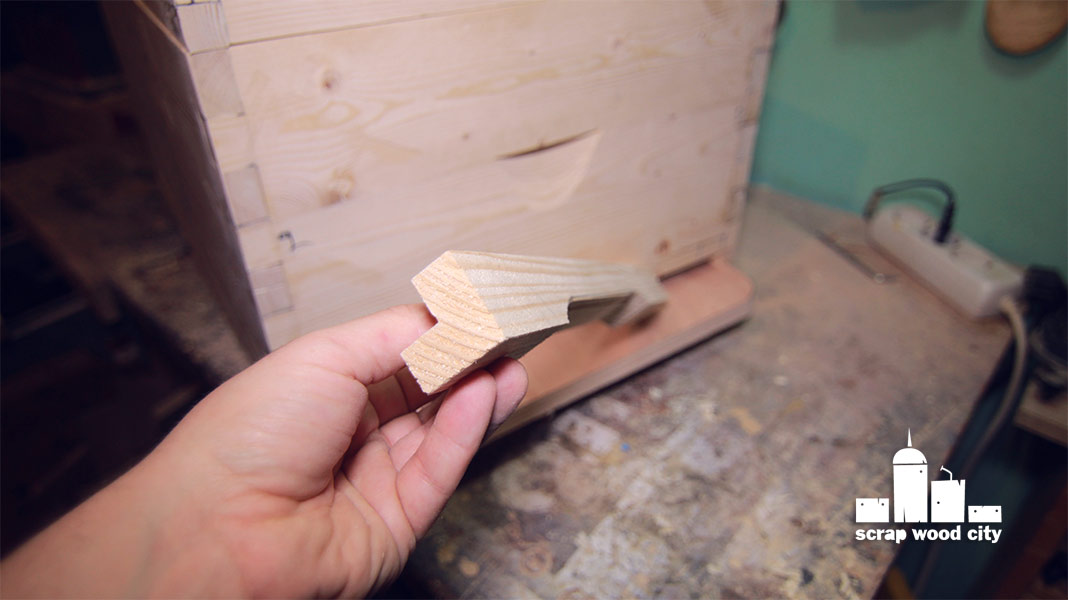
For the beehive handle holes I made a special jig for the circular saw, that cuts at an angle.
I glued the sides of the body. To fill the gaps on the joints I added glue and then sanded over it to cover the glue with dust.
I made the frame of the bottom using my table saw.
The bottom Is made of plywood, I cut the pieces to size using my circular saw and my table saw. For the curvy parts I used the bandsaw. I joined the bottom parts with biscuits.
I also made the legs of the bottom and the opening. The opening slides on a groove which is cut from the legs sides. For the opening’s handle I used my hole saw on the drill press to cut out a circle.
The legs are screwed in place. I predrilled pilot holes and counter sinked them on the drill press. I also screwed in a stop block to act as a stopper for the bottom’s door.
Now it was time to make the beehive’s top. I cut the pieces to size on my table saw and joined them again with box joints.
I used a hole saw and drilled holes at an angle using my drill. I also set my jigsaw at an angle to make the rest of the cuts. I did that to make the ventilation holes at the top. Those holes must be at an angle, in order for rain water to run outside the hive. I also used a chisel to fine tune the holes.
I glued the top’s sides and then glued the top panel.
Using my table saw I made the beehive’s door. The door serves two purposes. When it is in the first position it allows the bees to enter or leave the hive.
When the beekeeper want to move the hive, he sets the door to the second position. That way the bees cannot leave but air can still enter in order for the hive to remain well ventilated.
To make the air hole, I clamped the door on my table saw’s fence and slowly raised the blade in order to make a slot on the door.
I used my bandsaw to cut the extra material of the top. I used my router upside down and a flush trim bit, to cut the top flush with the sides.
At this point most of the woodworking had been done. Now I have to install the metal parts, sand it and finish it. I also have to make the frames.
That’s it for now, I hope you liked it!

What about the dimensions?
ReplyDeleteCan i order or download the blueprints ? Thanks !
ReplyDeleteSorry my friend I did not use blueprints. I had another hive in the shop and I got the dimensions from it
DeletePlease tell me ,per part size
ReplyDeletePart to part
Could you please share the dimensions / details of the circular saw jig that you used for cutting the handles?
ReplyDeleteHi could you please tell me which wood glue you use?
ReplyDeleteThanking you