


Tools and materials I propose:
I wanted to make a wooden kazoo. A flying bee kind of sounds like one. So why not make a bee shaped kazoo!
I begun my cutting a piece of basswood to size on the table saw. But before I did that, I installed the zero clearance insert. I was about to cut small pieces and I didn’t want anything jamming my saw’s blade.
I then lowered my blade and cut a shallow groove with multiple passes on the table saw.
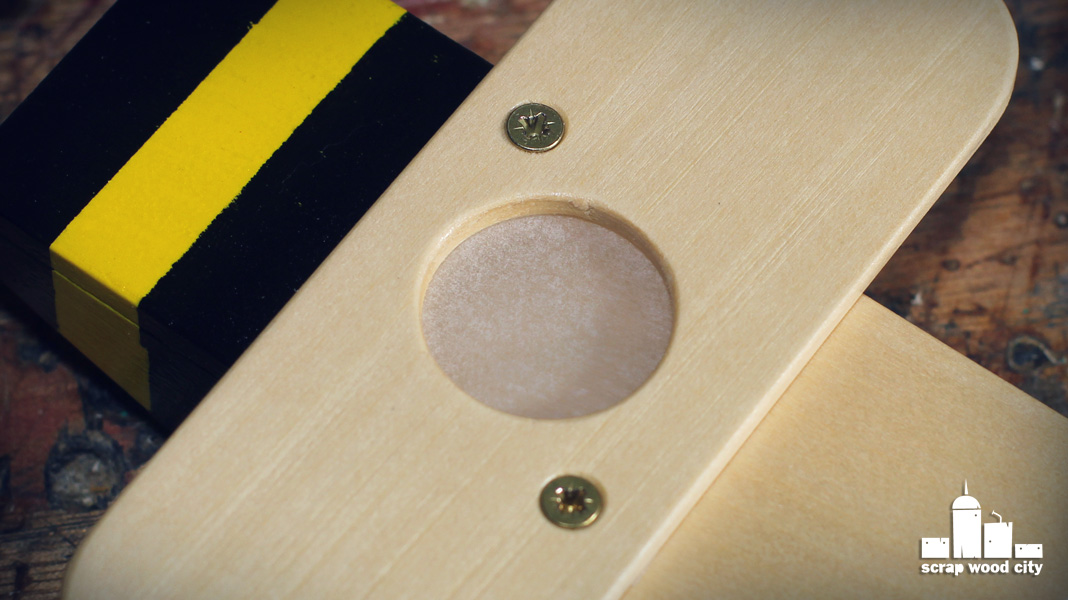
Then I used a forstner bit to open up the hole for the membrane. I drilled both the cap and the wings at the same time.
Using a washer I designed the round overs of my wings. I then used the belt sander to shape them.
Then I glued the cap on the body. Once the glue dried I sanded everything flush on the sander.
On the bandsaw I cut the body shape. I finished shaping on the belt sander.
I sanded everything with 100, 220 and 320 grit sandpaper.
With my rotary tool I predrilled pilot holes. And with a counter sink bit I countersunked the holes of the wings.
Then I used masking tape before I started painting with latex paint. To make small stripes for masking, I placed the tape on a piece of plexiglass and then cut the stripes with an exact knife.
I finished the piece with several coats of spray varnish. I lightly sanded between coats with 220grit.
As a membrane I used baking paper. You can experiment with different papers or plastic. The membrane is secured in place with the screws of the wings.
In order for the kazoo to work you have to hum a melody in the mouth piece. The humming vibrates the membrane and produces a tone.
I am really happy with my bee kazoo, but that was it, see you soon with a new project video.
Disclosure: Some of the links below are affiliate links, meaning, that at no cost to you, I get a small commission if you click through and make a purchase.
No comments:
Post a Comment