


I made this small desktop easel out of spruce. It is ideal for creating small paintings or drawings. I made it using mostly the table saw.
I begun by making the base of the easel. Using my cross cut sled on the table saw I cut all the pieces to size.
I then taped two pieces together and created a notch on each one using the table saw. I did that with several passes.
I then made the two pieces that fit in the notches out of plywood. I taped them together, drilled the hole needed and shaped them on the belt sander. I then glued and screwed them in the notches. I then glued the pieces of the base. I used pocket holes to screw them together.
I then needed a vertical cut on the side pieces of the easel. I did that by making a temporary jig on the cross cut sled.
I then screwed the pieces of the top part. I predrilled pilot holes to avoid splitting while screwing. I also used my clamps to hold the pieces for the screwing process.
On the sides of the top I needed two long straight holes. I clamped the piece on the fence on the table saw and slowly lifted the blade of the saw until I reached the width I needed.
I then cut, shaped, and drilled a few other similar pieces of the build.
I prepared the pieces for the place that the canvas sits on. I glued and nailed them together. I used my nail gun in this situation.
I then nailed the piece on the easel to hold it in place. I secured it with a few screws.
I also glued, nailed and screwed the center piece in place.
I then made the horizontal piece. In byzantine iconography this piece provides support for the hand rest used in this type of art. I used the cross cut sled on the table sew to make a notch in the center of the piece. I then drilled a hole and counter sinked it with a forstner bit.
I then marked equal distances on the center piece using the back side of my caliper. I drilled the holes. In those holes the horizontal piece is secured in place with a bolt.
Most movable pieces of the easel are joined together with screws. I cut the screw to size with a hacksaw. Using the belt sander I created a bevel in each end of the screws. This helps the nuts to be more easily screwed in place.
I then assembled all the parts together with butterfly nuts and bolts. When needed I used washers as spacers.
I sanded everything with 100grit using my random orbit sander and a sanding block.
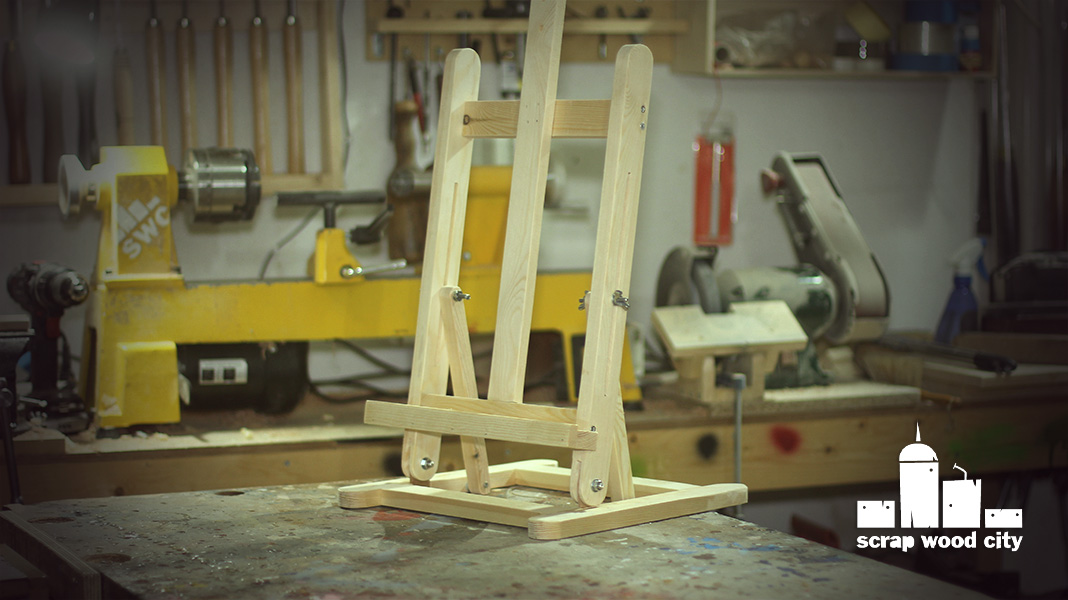
My little easel is now ready for painting and I am really happy with the way it turned out!
the video said 'how to' but i wasnt able to find the cut list and directions. am i missing something?
ReplyDeleteYes, a cut list would be nice....
DeleteI'd love to make this.... a cut list or some basic dimensions of the major elements would be great!
ReplyDelete