


Tools and materials I propose:
Cleaning & polishing rotary tool kit
In this video I convert a broken soldering iron to a branding iron. I tried to make it as simple as possible using tools most people already have.
First of all I removed the broken parts of the tool an I added some heat shrinking tube to protect the wiring a little bit more.
I then cleaned the metal parts. I used sand paper and my rotary tool with a buffing wheel for this job.
I then threaded the tip of the soldering iron and a piece of brass. I used an M4 tap and die set for this job.
Using the rotary tool with a cutting disc and a file I shaped the stamp piece.
To make a handle I cut a piece of wood from an old hammer handle. I used my miter box and a hand saw for the job.
I used my drill to drill the hole for the wires.I drilled a larger hole in front for the soldering iron. I shaped it on the belt sander and finished it with mineral oil.
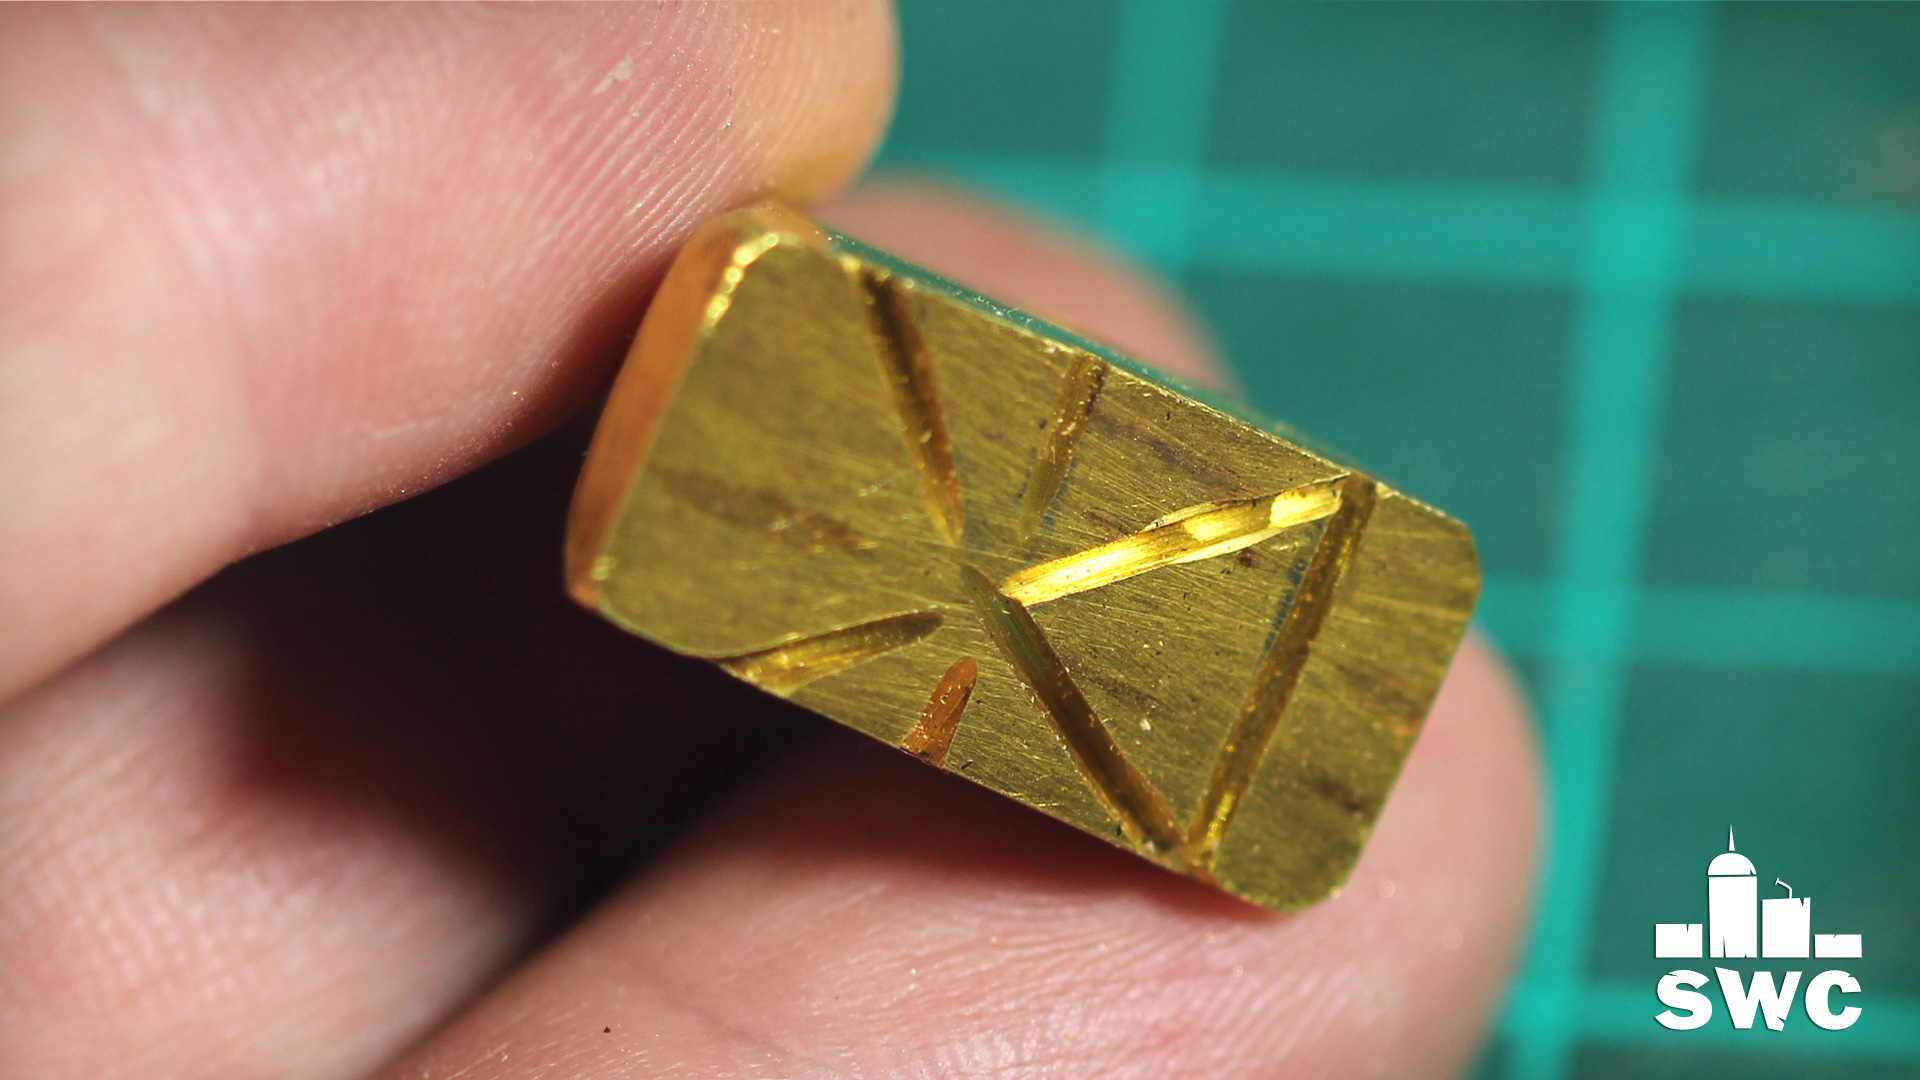
I then used my rotary tool to carve the stamp. The stamp’s design must be reversed in order to print properly. I used a cutting disc to carve my design, but you can use a small spherical bit to carve more complicated designs.
And basically my branding iron was ready. If you use an under 30Watts tool you can boost the temperature a little bit with a propane torch.
I hope you found my little video useful. But that was it. See you soon with a new project video.
Disclosure: Some of the links below are affiliate links, meaning, that at no cost to you, I get a small commission if you click through and make a purchase.
No comments:
Post a Comment