Tools and materials I propose:
I have a lot of pine boards from an old bed. They were perfect for this project.
I cut them to size with my circular saw and a speed square.
I then used my table saw to cut them to width. But my table saw broke down and I had to do all my cuts with my circular saw from this point on.
Using my thickness planer I planed my material. You can avoid all that trouble by purchasing precut lumber to size.
The side boards were cut at 30cm while the side boards were 25cm.
I joined the pieces with butt joints. I first did a series of cuts with the circular saw and then used a chisel to clean the areas. After doing a few tests, this procedure worked out great.
I then glued the carcass of the cabinet together. As a back panel I used a piece of thin MDF. The back panel falls into grooves which I created with the circular saw. To clamp the box I used my corner clamps and a picture frame clamp.
Once the glue dried, I reinforced the joints with 6mm dowels. I like to use a piece of tape on my drill bit, as a depth mark. I trimmed the dowels flush with a flush trim saw.
Then I cut some boards to make the front panel. I used dowels to keep the boards from sliding around while glue up. I drilled the holes on one side first. Then I used my dowel marking guides to create the matching holes.
While the panel was drying, I used double sided tape to glue some sandpaper on a piece of plexiglass. This created a huge flat sanding block. I used it to flatten the front side of the cabinet.
Time to flatten the front panel. I first did some cross grain planing to remove material fast. Then I did some parallel to the grain planing as finishing passes. You can avoid all that trouble just by buying a ready made panel.
The front door is just a piece of the carcass cut to size. I used my circular saw to cut the door. Before the final cut, I planed a couple of pieces of wood to size to clamp the door in place. Then I did the final cut with ease.
I then used a hand plane and my sanding block, to clean the saw marks and flatten the door and the cabinet.
I then used a handsaw to cut the front panel to size. I didn’t want to glue the panel, so that it can expand and contract freely. I just added some trim in the front and glued a few blocks on the back. I cut the trim to size using my miter box. I then glued and nailed it in place.
At this point I filled all the imperfections of the wood and sanded everything with my random orbit sander. I also glued a small piece on the back of the door. I glued and nailed two stop blocks on the inside of the cabinet, to hold a small shelve.
Since I didn’t have an operating table saw, I hand cut the French cleat that would hold the cabinet on the wall. To make that long miter cut, I kept changing sides in order to keep my cut straight. I then cleaned my cut with my block plane.
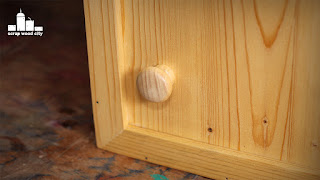
Then I added three hangers on the door. I also added a door handle. I clamped the door in place and then installed the hinges. I epoxied a rare earth magnet in place and a screw on the matching side. This mechanism will keep the door closed.
I used masking tape to create a mask of a cross. I painted the cross red with latex paint.
I finished the cabinet with three coats of clear water based satin varnish. I sanded between coats with 220grit. Usually two coats are enough, but this was really old and dry wood, so it absorbed the varnish really easily.
My cabinet was ready at this point and I am really happy with the way it came out!
Having first aid materials around, is really essential, especially in a woodworking shop.
Anyway, I hope you’ve enjoyed this one, because that was it, see you soon with a new project video!
Disclosure: Some of the links below are affiliate links, meaning, that at no cost to you, I get a small commission if you click through and make a purchase.


No comments:
Post a Comment