Tools and materials I propose:
Many people are kind of afraid soldering copper pipes for DIY projects. But this is actually a pretty easy procedure.
Before you begin you are gonna need a few tools.
Obviously you are gonna need copper pipes and fittings. You will need solder and flux. A propane torch and a propane cylinder. A copper pipe cutter. Don’t buy the cheapest cutter, buy a descent one because most cheap ones won’t work. You will also need a piece of 100 grit sandpaper.
To cut the pipe, place the cutter in place and tighten it just a bit. Then make the first turn. Tighten a bit more and make another full circle. Repeat that process until you gently cut all the way through.
Then sand the touching surfaces you want to solder. This way you clean the joints. Next add the flux and then the fitting.
Assemble the torch. Open the valve a little and light the torch. Then increase the propane flow.
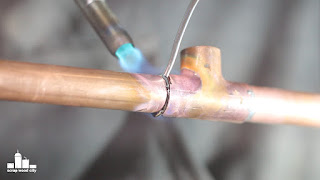
Start heating the joint evenly. When the temperature is high enough, the solder will follow the heat and the flux. Then take a wet rag and clean the joint. This also cools the joint faster.
When possible, add the solder from the top. Let gravity do the rest.
You don’t have to turn the pipe around, the solder will follow the heat. As you gain experience you will add just the tiny bit of solder you need.
Wasn’t that easy?
Just a few tools and you are good to go.
I hope you found this tutorial useful!
See you soon with a new project video!
Disclosure: Some of the links below are affiliate links, meaning, that at no cost to you, I get a small commission if you click through and make a purchase.


No comments:
Post a Comment