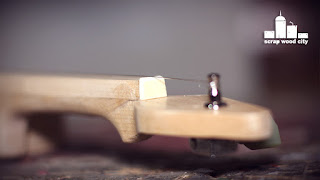
I made this experimental violin, out of birch plywood, maple and copper. The instrument uses a piezoelectric pickup under the bridge. The pickup converts the vibrations of the bridge into electric signal which is then amplified with an amp.
First of all I designed and printed out the template of my instrument.
The body of my instrument is made out of 9mm birch plywood pieces. I glued the template on the plywood with spray adhesive and cut it out on the bandsaw.
I used my heat gun to remove the template easily.
I then glued the body pieces together using wood glue and clamps.
I used my router with a straight bit to cut out the f hole shapes.
I then used my belt sander and my rotary tool to sand off the saw marks from the bandsaw.
I made the neck out of two pieces of maple. I made a straight cross cut on the table saw and then cut the rest on the bandsaw. I used a chisel and my sander to clean up the saw marks.
I used my router again to route the hole for the neck. I finished the hole with a chisel.
I then 3D cut the headstock on the band saw. I cut the first side, glued the pieces again with hot glue and cut the other side.
I glued the headstock and the neck together. To avoid the two pieces from sliding around while glue up, I used two bamboo stick pins.
Using my thickness planer I prepared the piece for the fretboard. I glued it on the neck again using two pins.
Using a forstner bit, I opened up the hole for the piezoelectric pickup on my violin’s body.
On the bandsaw again I cut a small circular piece to act as a cap for the pickup.
I then drilled and routed the holes for the electric parts of my instrument.
Out of a copper sheet I made the output jack holder. I cut it out on the bandsaw and shaped it on my belt sander. I used a step drill bit to open up the hole for the jack. I also bended the holder to match the curve of my violin.
I shaped the neck using rasps, files sandpaper and my spokeshave.
I glued the neck on the body. I also used a counter sinked screw for more reinforcement.
I finished the violin with three coats of satin, clear, water based varnish. I lightly sanded between coats with 220 grit sandpaper.
I then shaped the copper string holder. To avoid breaking it I used my propane torch while bending it to shape.
I added the key.
I soldered all the electric parts of the instrument. To hide some soldered parts I used heat shrinking tube.
I assembled my instrument and added a string.
I made the nut out of a piece of bone which I shaped with a file and sandpaper.
I made the bridge out of a piece of maple. I cut it on the bandsaw and shaped it on the belt sander.
At this point my violin was ready. I also added a piece of masking tape on the fretboard. On this piece I marked the fret positions so I can play the instrument in tune.
I am really happy with the way my electric violin came out! I hope you like it too!


No comments:
Post a Comment