Friday, February 24, 2017

How to make a DIY lightsaber candle holder


I wanted to make a prop for a while. I also wanted it to be some kind of a useful item. As a result this idea came up.

I based my design on original references but I added a few personal touches.

I used lime tree for this build.

First of all I jointed one face of my wood by using a hand plane across the grain to remove much stock. I also marked the area with chalk to let me know which areas of the stock had been removed. I then used the plane parallel to the grain of the wood to smooth things out.

I cut the piece in half on the bandsaw.

I applied glue and glued the two parts together using clamps.

I then drew the diagonals at the ends of my stock and used a compass to drew equal circles in both ends.

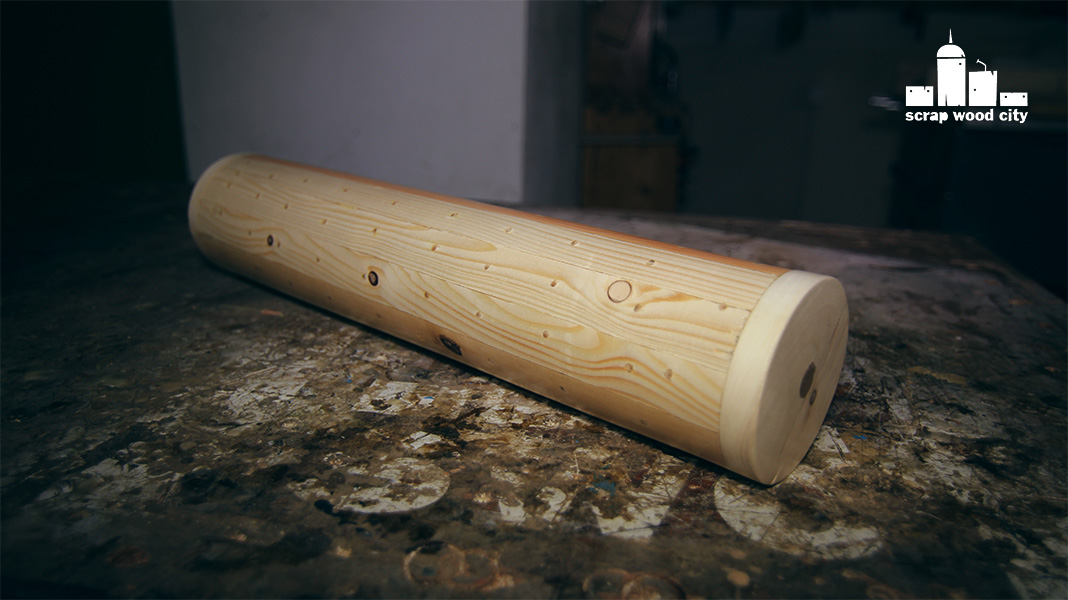
I used my wood vise and a long clamp to secure the piece. I then used my plane again to round over the piece. I could do this on the lathe, but I thought it was a cool technique, worth presenting. This also saved me quite a bit of time on woodturning.

I then mounted the piece on the lathe between centers and used a round scraper to round over my stock. I used my regular flat chisel to make a clean cut in the end.

I also used the parting tool to create a tenon on one end for my chuck.

I took the time to design a template which I glued on a piece of MDF and then cut it out on the bandsaw. The templates for the lathe must be halfs of the intended shapes.

I then established the length and the width of my stock on the lathe, based on my template.

I used my calipers and a sharp flat chisel to create a cylinder with the maximum diameter I needed.

I then used the template to mark and measure before shaping on the lathe. I mostly used a flat chisel and a skew to make all the shaping on the lathe.

I the sanded the piece on the lathe, and removed the last bit with a gouge.

I cut the tenon on the bandsaw and sanded it flush on the disc sander.

I then cut a small piece to size to use as the lightsaber’s switch. I mounted the piece on the vise with a piece of sand paper wrapped around it. I then sanded the small piece over that set-up in order make the small piece round underneath. I then glued it in place. 

To make the small buttons I shaped a really small piece on the disc sander and used a chisel to cut out two triangles, which I also glued in place.

I then primed the whole piece. After the primer dried I sanded it over it.

I applied a few coats of silver metal paint.

I masked the piece with blue masking tape and then sprayed on the black color.

I masked again and applied the bronze color. 

I used acrylic paint to paint the buttons red and green.

I sealed the paint by applying a few coats of clear glossy varnish.

My lightsaber candle holder was now ready, I hope you like it!


Friday, February 17, 2017

How to make a spinning top out of epoxy resin and wood, for a good cause


More info on the links below:


For this video, I used a scrap pine piece, clear casting epoxy resin and red pigment.

First of all I used a center finder, to mark the center of my piece.

I then turned the piece true on the lathe while mounted between centers. 

I used the parting tool to create a tenon in order for the piece to be mounted on my chuck.

I mounted the piece on my chuck and also added a drill chuck on my lathe’s tailpiece. 

Using a forstner bit I opened up a hole on one end of my stock. I used the spindle gouge and a flat chisel  to open up the hole even more and create a mold for the epoxy resin.

I then mixed two part epoxy resin and added red pigment. I should have used less pigment in order for my final product to be more transparent. I poorer the ten in my wooden mold.

This type of resin releases the bubbles on it’s own. I let the resin cure for two days and it came out great.

I then remounted the piece on the chuck. I used a spindle gouge and a round scraper to shape my top.

I sanded the piece starting from 100grit, moving to 220, then 320 and finished by wet sanding with 500 and mineral oil.

I removed the top from the lathe with a flush trim saw.

The tip of the top had the center marked on from the lathe. On the drill press I drilled a small vertical hole and hammered in place a round headed nail. 

This way the tip of the top cannot brake or chip.


I hope you like my little spinning top!

Sunday, February 12, 2017

How to make an experimental mini electric guitar


I found an old bed in the garbage. I think it was pine wood. I decided to make a mini guitar with it.

First of all I used a handsaw and a chisel to cut the bed’s post to more manageable pieces and to disassemble the whole thing.

I then jointed two thick pieces with my hand plane and glued them together.

The bed had a cylindrical part. I mounted that on the lathe and reduced it’s thickness to create my guitar’s fretboard.

I planed the glued the boards straight. To remove more material I planed the boards across the grain. Then I smoothed the surface, going parallel to the grain of the wood.

I then drew my guitar’s body, and cut the basic shape on the bandsaw.

To remove the saw marks and to finish the shaping of the body, I used my spokeshave, rasps and sand paper.

I then routed out the place for the pickup. I did that in several passes in order to go deep enough.

I also used the router to open up a space for the electric parts on the back. I connected all the champers by drilling holes. To open up the whole for the jack I used my step drill bit.

I covered some imperfections with wood filler, and sanded over it after it was dry.

Using my table saw and a cross cut sled, I cut out two lap joints for the guitar’s neck.

I then planed down a thinner piece of the bed to act as my headstock. I cut it’s basic shape on the bandsaw and shaped it with a rasp and sandpaper.

I glued the neck on the fret board. 

Out of a piece of plywood I made the pickup’s mounting base. I cut it’s shape on the bandsaw. I removed the inner piece on my scroll saw. I shaped it with my rasp. I drilled all the holes for the screws on the drill press and counter sinked the ones on the edges.

I then glued the neck on the guitar’s body. 

Using a hacksaw I cut a scrap metal piece, to act as my jack plate. I drilled holes on it on the drill press. I used a tap in the middle hole to create threads. This way the jack is screwed on it. I mounted the plate on a vise and hammered it to give it a curve to match the curve of my guitar’s body.

I shaped the headstock using my draw knife, a number 1 rasp, a number 2 rasp and sandpaper.

After the glue was dry, I secured the headstock and the fretboard in place with screws. To add the screws I predrilled some pilot holes and then counter sinked them so the screws sit flat.

For keys I used a pair of old guitar keys I had from an old guitar. I cut them to size with my hacksaw and shaped them on my grinder. 

I then used a saw and a file to cut a notch on the fret board for the nut.

I sprayed a primer to all the parts. After it was dry I light sanded with 300 grit sandpaper.

I then sprayed on the color coats.

I mounted a piece of wood on the lathe and turned a knob for the volume pot. I used a skew chisel and a spindle gouge. To drill the hole in the middle with accuracy I did it also on the lathe.

I wanted the front of the headstock to be black, so I masked the neck with blue masking tape and painted it over.

I finished everything with a few coats of clear varnish.

My electric connections were pretty easy. I used a wiring diagram for a humbucker and a volume and soldered all the parts together. I connected the electric parts temporarily and tested them out on a small amp. I taped the pickup with a metal piece and if it created a sound on the amp, the pickup worked.

I then made the bridge and nut from a piece of hardwood. I cut their shapes on the bandsaw and shaped them on the disc sander. For the bridge I also cut a metal piece with a hacksaw and shaped it on the grinder. Both pieces had to match the radius of the fretboard.

Now it was time for assembly. Most of this procedure was drilling pilot holes and screwing things in place.

I also added two string guides on the headstock.

The stings are mounted on the guitar’s body through two holes. In order for the strings not to hurt the wood, I hammered four rivet heads in place.

I used a small V file to open up grooves for the strings, on the bridge and nut.

For fret I used zip ties. To find their right position, I used an online fret calculator app. The important thing here, is to measure the distance from nut to bridge. I marked the distances of the frets (from the nut ) and added the zip ties exactly before the mark. 

One important thing I did not showed in the video is that I remade the pickup’s base from thicker plywood. This way the pickup sits much closer to the strings and this increased it’s volume and sound quality, pretty much. You can only see this important detail at the end of the video where I play the guitar.

My guitar was ready rock at this point, I hope you liked it.

Thursday, February 2, 2017

How I made a mini hacksaw blade knife


I made this DIY knife using an old hacksaw blade and a piece of niangon wood.

First of all I cut the blade to size and shape with my rotary tool and a cutting disc.

The blade is really hard tool steel. In order to drill the holes for the knife’s pins, I used a propane torch to heat the blade and lose it’s hardness. I then moved to the drill press and drilled out the two holes.

After that process, the blade was bent. So I reheated it and used a hammer and a mini anvil to forge it straight again.

I then heated the blade to red hot again in my mini homemade forge. I then quenched the blade in oil to harden it.

Because the blade was now really hard and could easily snap. I heat treated it in the oven at 180 degrees celsius for 2 hours. This procedure should help the blade regain some of it’s flexibility. Ofcourse these procedures vary from steel to steel. I just did the basic DIY stuff and hoped it will work fine.

I then sanded the blade to clean it up with 100 grit sandpaper and oil.

Next, I moved on the belt sander to grind the bevel of the blade. During this procedure I dipped the blade in water quite often. This way the blade does not lose it’s hardness.

I used the bandsaw to split a scrap piece of niangon in half. I mounted a piece of sandpaper on a flat surface and jointed the two pieces of wood.

I then used my chisels to carve a groove in order to receive the blade.

Back on the drill press I drilled the holes for my pins.

I used two nails to act as knife pins. I mixed two part epoxy glue and glued everything together.

After the glue dried, I used my rotary tool again, to cut the excess metal of the nails.

I used the bandsaw to cut out the shape of my handle and then used rasps and sandpaper, to finish the handle.

I finished the handle with 4 coats of clear, satin water based varnish with sanding between coats.

I sharpened the blade using three different grits of oil stones. Every time I created a burr on one stone I removed it and moved to the next grit. I polished the blade using polishing compound and a strop.

My blade came out nice and it is razor sharp.

I think it works great for small carvings and detail woodworking jobs.

Friday, January 27, 2017

How I made an India inspired tambur


I made this instrument out of a piece of niangon wood, spruce for the top and nails that act as moving frets.

It’s design combines elements of eastern Mediterranean tambura and the Indian sitar. It has moving steel frets like a sitar and also a sitar-like bridge that give a unique buzzing sound to the strings.

I do not have a thickness planer so I used my router and a special jig to flatten both sides of my stock.

I then designed the basic shape of my instrument.

I started hollowing the body using a V chisel and carving gouges. This is a slow process, so I used the router to remove most of the material and then finished the job with hand tools.

I moved on to the bandsaw to cut the outer shape of the piece.

To clean up the bandsaw marks I used my no1 rasp and then moved to a finer no2. Lastly I sanded the surface.

I rough shaped the neck with my draw knife. I moved to a spokeshave and finished the job with rasps and sand paper.

I cut two wooden rails on my table saw and glued them on the fret board.

On a piece of spruce with really tight grain I traced the shape of the body and cut it out on the bandsaw.

I created a sound hole with my scroll saw.

I glued a brace under the top and carved it to shape with a sharp chisel.

I glued the top in place and then trimmed it flush with my spokeshave and a small knife.

I sanded the top really thin.

I finished the piece with water based clear satin varnish. I applied 4 coats with light sanding between them.

I’ve installed all the metal parts of the instrument, besides the frets. 

I made the nut and the bridge. Most of their shaping was made on the disc sander. The bridge is similar to a sitar bridge. I made it out of niangon and a thin metal sheet piece. I glued all the parts of the bridge with super glue.

With a small V shaped file I opened up the groves that support the strings.

I made the frets out of thick nails. I cut them to size with my rotary tool and a cutting disc. I also created a groove on one of their ends. 

I used a red string to secure the frets in place. I used the technique used to tighten the sitar frets. I should have used a thinner string though. 

Using a tuner I moved the frets to their right positions.

My instrument was now ready. 

I hope you like it.

Wednesday, January 18, 2017

DIY rainstick on the lathe, out of pallet wood


This musical instrument kind of mimics the sound of rain drops falling.

It is actually a wooden tube with bamboo sticks in it. It is also filled with rice. When  the rice falls it gets slowed down by the sticks and a rainy sound is produced. People used to make these from cactus. They turned the nails of the cactus inside out and filled the tube with small rocks or seeds.

I made my rainstick out of pallet wood. I used a jigsaw to remove the wood boards from the pallet.

I then used my jointing jig, to straighten one edge of my pallet boards one the table saw.

The main cylinder is made out of 12 segments. This means that the boards need to have a 15 degree bevel on each side. I created that bevel on the table saw.

I then glued the pieces of the cylinder together using blue masking tape to clamp them.

I also glued two boards together. This gave me enough material to cut out two circles for the cylinder’s caps. I cut them out on the bandsaw.

After the glue dried, I trimmed  the cylinder to size on my table saw, using my cross cut sled.

I flattened the caps and the cylinder’s edges on my disc sander.

I glued the caps to the cylinder.

I used a center finder, to find  the center of the caps.

I then screwed the face plate on the cylinder and mounted the whole piece on the lathe.

Using a spindle gouge I turned the cylinder round. I used a flat chisel to make the finishing cut.

I then sanded the piece with 100 grit sand paper.

I used a piece of cord and masking tape to mark a spiral around the cylinder. I then drilled holes for the bamboo sticks around the spiral.

I placed the bamboo sticks in place and added super glue. I flush trimmed  the sticks with a flush trim saw and then sanded the piece again moving from 100 to 320grit.

I filled the gaps using wood glue and sanding dust.

I drilled a hole on one cap to add the rice. I added the rice and then turned a plug on the lathe, which I then glued in the hole. I sanded the cap flush on my disc sander.

I then finished the piece with 3 coats of clear, satin water based varnish. I sanded between coats with 320grit sand paper.


I am really happy with the way the my rainstick came out, I hope you like it!

Wednesday, January 11, 2017

How to make a 2 string instrument from an oven pan ( panjo )


I made this instrument from an oven pan and spruce.

On a piece of 2x4 I designed the profile of the neck and cut it out on the bandsaw.

I used the disc sander, to shape the front of the neck.

I then marked the sizes of my round overs and started shaping the neck with my spoke shave.

I used a rasp to shape the areas that the spoke shave could not reach. For even more difficult areas, I used sand paper wrapped on a cylindrical marker.

I then used a center finder to mark the center of my pan.

I drilled a couple of holes. The pan is pretty hard steel, so I first drilled smaller holes and then opened them up with a step drill bit.

The neck is mounted on the pan with two large bolts. This technique is inspired by banjo making. In order for the neck to receive those bolts I drilled the holes.

I cut the bolts to size with my hacksaw.

I sanded the edge of the cut on my disc sander. I did that on the edges in a conical shape, in order for the nuts to get bolted on easily.

I then used 5 minute epoxy, to glue the bolts in the neck.

I drilled the holes for the tuning pegs.

I measured my scale at 58cm from nut to bridge, and used a fret calculator to find the exact positions of the frets.

I marked the positions of the frets with a pencil and used a saw and a miter box to cut the fret slots.

I then drilled the holes of the fret position guides. Two of them would act as pins to prevent the fretboard from slipping during the glue up.

For fret position inlays, I used bamboo sticks.

I trimmed the bamboo sticks flush, using my flush trim saw and a piece of paper to prevent the fretboard from getting damaged by the saw.

I then cut the fret wire to size and pushed the frets in place with a clamp and two stop blocks.

To secure the frets in place, I added two drops of super glue to their sides. 

I used my rotary tool, with a cutting disc to trim the frets to size. I then finished that job with a sanding block.

I used my wood burner to burn dots on the sides of the frets.

At this point I assembled the pieces of the instrument, that were ready.

Using my hack saw I cut a metal piece to act as string holder. I drill the holes needed and bended it to size on my vise by hammering it against a screw driver.

I added the tuning pegs, predrilled pilot holes and screwed the string guides in place.

Using the bandsaw and the disc sander, I made the nut and the bridge. I mounted both on the vise, and used a V shaped file, to open the slots for the strings.

My instrument was ready, I tuned both strings in A octaves.

I hope you like it!