Wednesday, December 31, 2014

How to make a kitchen rolling table


This table is really useful in the kitchen. It can be used as a secondary bench or as an additional table.

The design is not unique, you can find similar designs around the web.

It’s dimensions are 58x50cm (table top) and around 85cm tall. For this project I used spruce.

First of all I cut my legs using a saw and my miter box.

I first made the two sides of the base. To do that I used dowel joinery. I marked all the pieces and drilled the first holes on my frill press. To find the right spot for the opposite holes I used my dowel pointers. I glued the two sides.

I used the same technique to glue the inner pieces.  In order to glue everything square I added the bottom pieces temporarily with clamps to act as support.

To make the top I slightly joined the boards using my block plane. I glued the top piece and I clamped it. I also used some weights to keep the top as flat as possible.

To cut the top piece to the right dimensions I made a straight edge for the circular saw. I glued two boards together in a 90 degree angle. I plunged the circular saw to establish the starting point of my cuts on the shorter board.

Now I cut the top to the correct size. I clamped the jig in place and cut with my circular saw.

The table has two shelves. I glued and nailed the pieces of the shelve. I used one of the pieces as a spacer.

I rounded over the edges using my block plane.

I rounded over the top using my router and a round over bit.

I screwed the top and bottom pieces of the table using metal angles. For this job I used a flexible drill extension in order to screw awkward places of the piece.

I sanded the piece with 120 grit sand paper. Then I vacuumed the piece and applied a coat of clear  satin water based varnish. I applied 3-4 coats and sanded between them with 400 grit sandpaper.

I added the wheels. I first predrilled some pilot holes and then screwed the wheels in place.


My table is ready.

Friday, December 19, 2014

Place a boat in a cut glass bottle


I’ve always liked miniature ships or boats in glass bottles. I guess I had to make one.

First of all I made a template of the boat and I glued it on a scrap piece of plywood.

I drilled some entry holes on my drill press for the scroll saw blade.

Then I cut the piece on the scroll saw. To remove the template, I first sprayed the piece with rust remover, let it soak for a while and then removed it easily.

I sanded the piece.

I then used my glass bottle cutting jig to make my basic cutting line. I heated the cut with a candle and then I cooled it with water. I repeated this process a few times until my bottle was cut easily.

I glued the ship in the bottle using my glue gun.

I glued the two pieces of the bottle back together using to part epoxy.

I added a small rope for decoration and for covering up the cut. I did that with my glue gun.

I made the bases using my scroll saw and a couple of scrap spruce pieces. I sanded them using a big dowel as a sanding block to sand the inner curves.


My piece is ready!


Get a free ship template here.

Sunday, December 14, 2014

How to make a pair of wooden push up handles


Those handles are very useful on doing many different exercises while keeping your hands clean.

I made them out of a scrap piece of plywood, some small dowels and a large one.

I first designed the template on a vector graphics software.

Then I used some spray mount to glue the templates on the plywood.

I drilled some entry holes for the scroll saw blade on my drill press.

I cut out the pieces on the scroll saw.

I then cut the large dowel to size, using my miter box and a saw.

I marked the depth of the plywood with a pencil and carved out some material from the dowel. This way I have a snug fit.

To remove the template from the plywood, I used a rust removing spray. I spray the pieces and let them soak for a while. Then It should be really easy to remove the paper from the plywood.

I sanded the pieces with 120 grit sand paper and glued them all together.

For extra strength, I added a dowel on the sides. I glued it and trimmed  it with my flush trim saw.


I applied a coat of teak oil and my handles are ready!

Free template here.

Sunday, December 7, 2014

How to make a cheap wooden spotlight


I made this spotlight out of scrap pieces of plywood and pallet wood. I needed  extra light source for my shootings so I decided to make one.

First of all I cut the pieces of the arms using my circular saw.

I  connected  the arm pieces using bolts, washers and butterfly nuts. To do that I need to first drill some holes on my drill press.

The head of the spotlight is a cheap IKEA lamp. I drilled four holes on it’s base. I connected the arm with the base using a couple of zip ties.

I connected all the pieces using bolts washers and butterfly nuts.

For the base of the arm I used pallet wood. I connected the arm with the base using a lap joint and screws. For the lap joint I traced the arm on the wood, made my side cuts with a saw and then chiseled out the material I did not needed. The pallet wood sometimes contains rustic nails that can harm your tools, so be careful.

I joined the two pieces of the base using a couple of wooden pieces that are screwed on the base. Before I added the screws I pre drilled some pilot holes.


This spotlight is not perfect but it will do a basic job for me. It is cheap and easy to make! 

Thursday, December 4, 2014

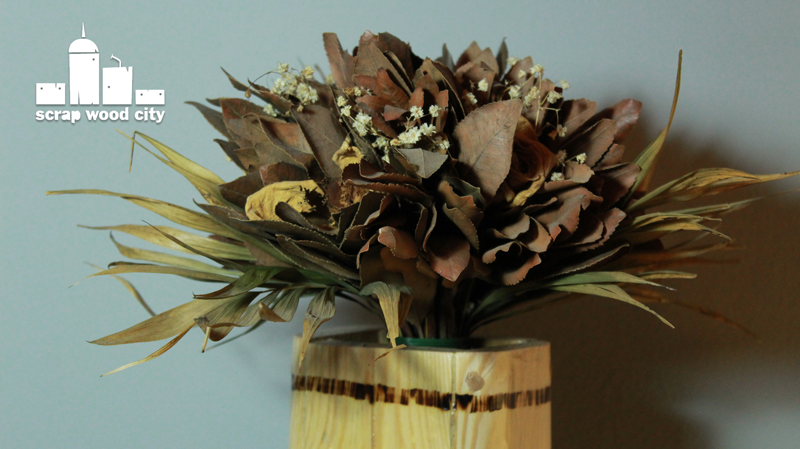
Pallet Up Cycle Challenge 2014 - Vase for dry flowers


This is my entry for Sterling's Davis Pallet Up Cycle Challenge 2014.

First of all I cut out the pieces I need out of a pallet. I clamp a piece of wood that acts as a straight edge on the pallet and make my cuts with my circular saw.

Then I use a miter box and a saw to cut my pieces to size.

I glue all my pieces together.

On the bottom I also add screws after I drill some pilot holes.

To make the sides a little bit stronger I also glue some dowels. Before that I make a few holes on my drill press.

I round over the edges and I also give a slight taper to the sides, using my hand planes.

I glue the dowels and trim them flush with my flush trim saw.

I fill the gaps with glue. I sand over the glue so that the gaps will be filled with glue and saw dust.

I draw a decorative line with my wood burner.


I apply a few coats of water based, clear satin varnish and my piece is ready.

Wednesday, December 3, 2014

Take and give, give and take animation


This is my new animation, about a man who lives in harmony with nature.

He takes what he needs but also respects the natural environment around him.

This way the circle of life is always spinning the right way.