Wednesday, December 31, 2014

How to make a kitchen rolling table


This table is really useful in the kitchen. It can be used as a secondary bench or as an additional table.

The design is not unique, you can find similar designs around the web.

It’s dimensions are 58x50cm (table top) and around 85cm tall. For this project I used spruce.

First of all I cut my legs using a saw and my miter box.

I first made the two sides of the base. To do that I used dowel joinery. I marked all the pieces and drilled the first holes on my frill press. To find the right spot for the opposite holes I used my dowel pointers. I glued the two sides.

I used the same technique to glue the inner pieces.  In order to glue everything square I added the bottom pieces temporarily with clamps to act as support.

To make the top I slightly joined the boards using my block plane. I glued the top piece and I clamped it. I also used some weights to keep the top as flat as possible.

To cut the top piece to the right dimensions I made a straight edge for the circular saw. I glued two boards together in a 90 degree angle. I plunged the circular saw to establish the starting point of my cuts on the shorter board.

Now I cut the top to the correct size. I clamped the jig in place and cut with my circular saw.

The table has two shelves. I glued and nailed the pieces of the shelve. I used one of the pieces as a spacer.

I rounded over the edges using my block plane.

I rounded over the top using my router and a round over bit.

I screwed the top and bottom pieces of the table using metal angles. For this job I used a flexible drill extension in order to screw awkward places of the piece.

I sanded the piece with 120 grit sand paper. Then I vacuumed the piece and applied a coat of clear  satin water based varnish. I applied 3-4 coats and sanded between them with 400 grit sandpaper.

I added the wheels. I first predrilled some pilot holes and then screwed the wheels in place.


My table is ready.

Friday, December 19, 2014

Place a boat in a cut glass bottle


I’ve always liked miniature ships or boats in glass bottles. I guess I had to make one.

First of all I made a template of the boat and I glued it on a scrap piece of plywood.

I drilled some entry holes on my drill press for the scroll saw blade.

Then I cut the piece on the scroll saw. To remove the template, I first sprayed the piece with rust remover, let it soak for a while and then removed it easily.

I sanded the piece.

I then used my glass bottle cutting jig to make my basic cutting line. I heated the cut with a candle and then I cooled it with water. I repeated this process a few times until my bottle was cut easily.

I glued the ship in the bottle using my glue gun.

I glued the two pieces of the bottle back together using to part epoxy.

I added a small rope for decoration and for covering up the cut. I did that with my glue gun.

I made the bases using my scroll saw and a couple of scrap spruce pieces. I sanded them using a big dowel as a sanding block to sand the inner curves.


My piece is ready!


Get a free ship template here.

Sunday, December 14, 2014

How to make a pair of wooden push up handles


Those handles are very useful on doing many different exercises while keeping your hands clean.

I made them out of a scrap piece of plywood, some small dowels and a large one.

I first designed the template on a vector graphics software.

Then I used some spray mount to glue the templates on the plywood.

I drilled some entry holes for the scroll saw blade on my drill press.

I cut out the pieces on the scroll saw.

I then cut the large dowel to size, using my miter box and a saw.

I marked the depth of the plywood with a pencil and carved out some material from the dowel. This way I have a snug fit.

To remove the template from the plywood, I used a rust removing spray. I spray the pieces and let them soak for a while. Then It should be really easy to remove the paper from the plywood.

I sanded the pieces with 120 grit sand paper and glued them all together.

For extra strength, I added a dowel on the sides. I glued it and trimmed  it with my flush trim saw.


I applied a coat of teak oil and my handles are ready!

Free template here.

Sunday, December 7, 2014

How to make a cheap wooden spotlight


I made this spotlight out of scrap pieces of plywood and pallet wood. I needed  extra light source for my shootings so I decided to make one.

First of all I cut the pieces of the arms using my circular saw.

I  connected  the arm pieces using bolts, washers and butterfly nuts. To do that I need to first drill some holes on my drill press.

The head of the spotlight is a cheap IKEA lamp. I drilled four holes on it’s base. I connected the arm with the base using a couple of zip ties.

I connected all the pieces using bolts washers and butterfly nuts.

For the base of the arm I used pallet wood. I connected the arm with the base using a lap joint and screws. For the lap joint I traced the arm on the wood, made my side cuts with a saw and then chiseled out the material I did not needed. The pallet wood sometimes contains rustic nails that can harm your tools, so be careful.

I joined the two pieces of the base using a couple of wooden pieces that are screwed on the base. Before I added the screws I pre drilled some pilot holes.


This spotlight is not perfect but it will do a basic job for me. It is cheap and easy to make! 

Thursday, December 4, 2014

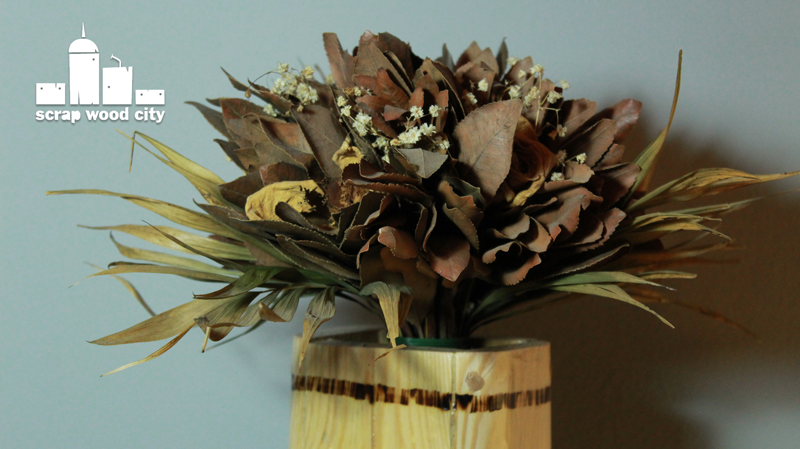
Pallet Up Cycle Challenge 2014 - Vase for dry flowers


This is my entry for Sterling's Davis Pallet Up Cycle Challenge 2014.

First of all I cut out the pieces I need out of a pallet. I clamp a piece of wood that acts as a straight edge on the pallet and make my cuts with my circular saw.

Then I use a miter box and a saw to cut my pieces to size.

I glue all my pieces together.

On the bottom I also add screws after I drill some pilot holes.

To make the sides a little bit stronger I also glue some dowels. Before that I make a few holes on my drill press.

I round over the edges and I also give a slight taper to the sides, using my hand planes.

I glue the dowels and trim them flush with my flush trim saw.

I fill the gaps with glue. I sand over the glue so that the gaps will be filled with glue and saw dust.

I draw a decorative line with my wood burner.


I apply a few coats of water based, clear satin varnish and my piece is ready.

Wednesday, December 3, 2014

Take and give, give and take animation


This is my new animation, about a man who lives in harmony with nature.

He takes what he needs but also respects the natural environment around him.

This way the circle of life is always spinning the right way.

Sunday, November 30, 2014

DIY cut glass bottle candle lamp


This is a lamp I made out of a glass bottle, a scrap piece of plywood and some wood savings.

First of all I use my cutting glass bottle jig to create a nice starting cut on the bottle.

Then I slowly heat the cutting line with a candle and then I cool it with water. I repeat this process several times. 

Then I gently hit the bottle. It should brake nicely, but some times this doesn’t always work out right. Most of the times it does.

I sand the cut edge with 180 grit sandpaper.

I create some wood savings with my block plane. I glue them on the bottle with my hot glue gun.

For extra protection I apply a coat of thinned with water wood glue mixture.

I take a scrap piece of plywood and cut out a circle using the adjustable circle cutter bit on my drill press.

Then I use a spade bit to make hole for the candle.

I also add 4 dowels in order for the bottle to stay in place.

I apply a coat of teak oil to the base of my lamp.

My lamp is ready. 
I used the wood savings because the bottle itself loses all the light of the candle. The savings help diffuse the light and make the lamp a lot brighter.

I hope you like it.

Caution: Be careful if you make a lamp like this because the wood savings are flammable. So try this at your own risk. My lamp does really well so far.

Thursday, November 27, 2014

5 reasons to love woodworking


I wanted to express myself by making a video about one of my passions, woodworking.

There are plenty of reasons to love woodworking. In this video I present my top 5 of them.

I hope you like it!

Monday, November 24, 2014

How to make a wooden star for the Christmas tree


First of all I designed a template for the star. You can download it here.

The two sides of the star are joined with a half lap joint. The template's inside cut is 5,4cm thick to match my plywood's thickness.

I spray glue on the template and glue it on the plywood. I then cut the two pieces on the scroll saw.

I take a scrap piece and mark the bottom of the star on it. I then I 3D cut it on my scroll saw. I drill a hole on the piece and I have my star's base ready.

Now I glue everything together.

I apply a couple of coats of gold spray paint. I also apply a coat of clear varnish.

My star is ready for my Christmas tree top!

Wednesday, November 19, 2014

My scroll saw had to be fixed


My scroll saw broke down a few days ago and I had to replace the broken part. I thought someone might find useful a video about it. At first I thought it was not going to work again. Then I found out that I can buy a new part and replace it easily.

Sunday, November 16, 2014

Make a center finder and a half lap joint


This joint is a very nice and strong one. To do it you need to find the center of the pieces that you need to joint.

So I begin by making the center finding jig.

I take a piece of wood and draw a line with a ruler. I then take a compass, place it on the middle of the line and mark the two opposite points.

I drill holes on the outer points and glue a couple of dowels.

I add a nail in the middle and i sharpen it with a file a little bit.

My jig is ready. Now time for the half lap.

I take the jig and find the centers of my two pieces.

I mark the second dimension of the joint using the other board as ruler.

I clamp my pieces on the vise and make the two cross cuts in each board.

I take a chisel and remove the pieces I do not need.

My joint is ready.

Saturday, November 15, 2014

Thursday, November 13, 2014

Cheap sharpening method for flat chisels and plane irons


I am not a high end woodworker. This method is not the best one out there but is good enough for me and the type of woodworking I practice.

First of all you need a sharpening kit. The kit contains a two sided sharpening stone, mechanical oil and a sharpening jig.

First of all I mount my chisel or my plane iron on the jig. The jig will help me establish the angle of the cutting bevel of my tool. I usually sharpen my tools at 30 degrees.

I begin with the lower grit side of the stone. I oil it and then sharpen my chisel with back and forth movements.

Then I turn around the stone and repeat the process with the finer grit side.

After a while a small curve is created on the tip of the blade. This is called the burr. You can barely see the burr with naked eye but you definitely can feel it with your fingers.  In order to have a sharp tool you need to remove that burr. To do so gently sharpen the back side of the tool. After a few light passes the bevel is removed.

My tool is ready for action!

Wednesday, November 12, 2014

Tuesday, November 11, 2014

How to make a wooden stomp box with a piezoelectric pick up


This is a stomp box I made out of some pine pieces and a piezo electric pickup.

First of all I cut my pieces to size.

Then I mark them inside out. This way I know my grain match. I also want to join the pieces using dove tail joinery. This is the reason I mark the insides.

I use my utility knife to mark the depth of my dove tails.

I mark my tails and also mark the waste area.

I clamp the first piece on my vise and make the first cuts. I clean the tails with my chisel.  I use the tails to mark the pins on the other board. I cut, and then chisel out the pins.

Ofcourse I am not a high end worker and my dovetails aren’t the best. But it was fun to make and they’ll do the job.

Before glueing the body I use a forstner bit to reduse the mass of the board in order for the jack and pot to fit.

I glue the body using my frame clamp. I first check for square edges.

For the top I join some boards using glue.

I clean the boards up with a plane.

I glue the top on the body.

I glue some wooden pieces to hold the bottom.

I use  a flush trim bit on my router to make the top and body flush.

I fill some gaps by applying glue with a syringe. Then I remove the excess glue and sand the piece. This way the gaps are filled with wood dust. Not the best method but it’s ok for me.

I round over the top using my block plane. I take it slow when doing that against the grain.

I screw the bottom after making some pilot holes.

Now I solder the electronics. To do that I used a wiring diagram.

I test the pickup and the volume pot.

I apply hot glue on the back of the pickup to avoid feedback.

I hot glue the pick up on the box. And assemble all the parts.

I use my wood burner to draw the top of my box.

I apply a coat of teak oil on the piece.

I screw an old knob on the pot.


My piece is ready to groove.

Sunday, November 9, 2014

Make a cubistic DIY wooden flower


This is a cubistic flower made of scrap wood pieces. 

To begin with, we need to make a jig. The jig is just a piece of MDF with an equilateral triangle hole in the middle. The sides of the triangular have the same length with the end grain sides of a piece of pine I will use with the jig later. To  make the triangle first I draw a line and then another line at a 60 degree angle. Then I take the compass and measure equal lengths for the sides of the angle. I join the two end points and I have a triangle with all it’s three sides equal.  Then I cut out the triangle on  my scroll saw.

Now I take my pine piece and fit it into the triangle. It fits OK.

I mark the four points of the end grain side of my piece. I secure the jig on my vise and fit the pine piece with one angle out. I cut it with my flush trim saw. I do that for the other three marked corners of my piece.

The base of my flower is  now ready. Now I mark some points with my compass and a ruler. I mark the two sides that are at a 90 degree angle with each other.  Then I cut out the first side on my scroll saw. Then I cut out the other side on my scroll saw. For this 3D cutting the scroll saw receives much pressure so you need to have a fairly big blade and slow speed on it.

Our 3D flower is ready. For the stalk of the flower I use a dowel which I bent with water and heat. Be careful if you do that and take all the necessary safety precautions. I scrape off the burning marks with my utility knife.

For the flower leaves I cut some of my pyramid scraps with a chisel and a blow with the direction of the grain.

I create some wood savings with my block plane for the inner flower part.

I use the  scrap pyramids from the first cut as cubistic rocks for the base of the flower.

I assemble everything with hot glue.  


My flower is ready. It has a low polygon 3D look which I like.

Thursday, November 6, 2014

How to make a scrap wood miniature catapult


This is a miniature catapult made of some scrap pine pieces I had. It used to be the laundry basket.

First of all I cut the side pieces to size. I clamp two of them in 90 degree angle, and trace the miters of the third piece with a pencil. I make some pilot holes with my rotary tool and screw the pieces in place.

I drill the holes for the wheels and the catapult's spoon base. It’s easier to do that now. 

I mount the inner pieces with screws. To make things easier I use clamps to hold thing in place before I add the first screws.

I cut a round piece on an inner piece for the spoon to fit nicely.

I add some screws for to act as holders for the rubber bands.

I flatten the base of the spoon a little bit, to be able to drill easier. I drill in order for the dowel to go through it.

At this point I realized I made a mistake and I have to move the inner middle piece back. Otherwise the spoon doesn’t have enough space to move.

I secure the spoon’s dowel with a few screws.

Now I make the wheels. I join two pieces of wood with my block plane. I glue and clamp the pieces. I place the clamps on opposite directions in order for the piece to be glued straight.

I cut out the wheels using a hole saw bit on my drill press.

I glue the wheels in place.

To make the spoon, I begin by removing a circle with the hole saw bit. I trace the spoon around it and cut it out on the scroll saw. I also cut notch on it. I cut the back of the spoon out of a scrap plywood piece. I glue them together and add a few nails.

To fit the dowel in the spoon I carve the end of it with a knife until I have a snug fit. I glue it and nail it in place.

I assemble my catapult. 


I make some ball of paper tape to use as ammunition and I am ready to roll!

Tuesday, November 4, 2014

How to make a cigar box style electric guitar!


This is a cigar box style guitar inspired from the early blues.

First of all I cut the pieces of the body with my jigsaw. I use a clamped board as a guide. I also use a smooth cut blade.

I will join the body using finger joints. I mark the depth of the fingers with a sharp knife and cut the joints on my scroll saw.

In one side I make a hole with a forstner bit to reduse the mass of the wood. This way the output jack of the guitar will fit in nicely.

I glue the pieces together. I clamp them with a frame clamp and I check for square edges.

I glue some wooden pieces to provide more strength and also mass for the screws of the top and bottom.

I will join the box with the fretboard using a half lap joint. I start by cutting the body and then use a chisel to finish the cut.

I cut the fretboard and clean the cut with a chisel. 

Now I need to remove wood mass from the fretboard in order for the pickup to fit in. I use my saw and a chisel to do the job.

I mark the the fretboard’s back and cut it on the scroll saw.

I use my rasp to shape the neck.  

I make a wooden pickup frame on the scroll saw. I mark where to cut by using an old pickup frame.

Now I cut notches for the keys to fit in. 

I use a fret calculator to find the positions of the frets. My scale is 63cm.

I mark the fret positions on the fret board with a pencil. 

I cut the fret slots. 

I glue the fretboard on the neck.

I trim the fret board flush with the neck using a block plane.

I drill holes on the fretboard for dowels. The dowels will be used as fret number guides.

I use my glue gun and dowel positions markers to find a good spot to drill the top and bottom for screws.

I screw the top and trim it flush with a block plane.

I trim the dowels on the frets with a flush trim saw.

I cut the fret wire to length. I fit in the frets and add super glue to their edges for strength. I trim the fret wire flush with a rotary tool.

I apply two coats of teak oil to all the wooden parts.

I use the pyrographer to burn my name and the guitar’s name on the wood.

For the wiring I used the schematics from Seymour Duncan’s web site. I downloaded the wiring diagram for a humbucker and a volume pot.

I solder the parts together. 

I make a tail piece from a crap piece of metal. I cut it and shape it on the vise. I drill all the holes needed using oil to cool down the parts, to prevent drill bit brakes. I screw it on the guitar.

I glue the nut with my glue gun.

I make the bridge using a scrap piece which I planed on the right thickness. I glue the bone with my glue gun.

I open the channels for the strings with a small saw.

I make the knob of the pot on my scroll saw.

My guitar needs some more fine tunings but at this point is playable and ready for action!

Thursday, October 30, 2014

Make two baby Maracas using the 3D scroll sawing technique


This is a pair of baby rattles made of 2 pieces of scrap spruce. It is made using the 3D scroll sawing technique. It is a technique thats involves cutting with a scroll saw in more than one dimensions.

First of all I make my pieces square by planing them with my block plane. I secure the piece on my bench using clamps and a wedge.

Then I draw the basic shape of my maraca on the two sides of the piece.

First I cut the piece in half. It is easier to do that now.

Then I cut the exterior pieces. I keep the cut outs and clamp all the pieces together with tape.

I make the cut on the other face of the piece.

I have my basic shape ready. I draw the inner line of the maraca before hollowing it.

I secure the pieces on the bench using the scraps of the cut and clamps. I hollow them out using my curved chisels.

I stop the carving when light can pass through the piece. This technique is also used in spoon carving.

I add some nails to create the rattle noise and glue and clamp the pieces together. I use the cut out scraps to clamp the pieces easier.

I add a decorative touch by wrapping the maracas with some twine. 

My baby rattle is ready!


Wednesday, October 29, 2014

Another DIY log box


Actually Ι've made a similar box in the past. But I had not made a video of it. For more info about this project go to my past blog article.

Thursday, October 23, 2014

Scrapy spends Halloween in a nail coffin


The iron maiden torture now becomes the scrap wood maiden. Scrapy just couldn't miss it!

Wednesday, October 22, 2014

DIY pixel face wooden pencil holder


I made this this holder from a scrap piece of pine.

First of all I cut the bottom of the piece. Then I cut one side. I continue by making two parallel cuts on the sides. Those last cuts do not go all the way.

Then I take my chisel and easily remove material with the direction of the grain. This way I hollowed the body of the piece.

Now I glue all the parts together and apply clamp pressure.

I fine tune the meeting points with my chisel.

I draw the facial characteristics on a scrap piece of plywood and cut them all on my scroll saw.

I glue them up. I apply pressure with a weight.

I fill the gaps with glue and wood dust by sanding over the glue. I sand the whole piece.

I apply a white base color to the piece.

I paint it black.

I wanted the facial characteristics to have a swirly look. So before the black dries completely I applied the green color. This way the two colors mix a little bit.

After the piece is dry, I apply 2 coats of clear satin water based varnish on it. To make things a little easier I made a base using hot glue and screws. This way I don't have to wait for the bottom to dry, before I varnish the rest of the piece because the piece can sit on it.

My pencil holder is ready.