Saturday, May 29, 2021

How to make a simple DIY bench cabinet out of OSB


Tools and materials:

Circular saw

Circular saw guide rail

Forstner bit set

Jigsaw

Corner clamps

Centre drill countersink bit

Table saw

Cordless drill

Cordless Impact Driver

Air compressor, nail and staple gun kit

Mini machinist’s lathe


In this video I make a simple bench / cabinet out of OSB. I basically made it for my mini machinist's lathe. 


I begun by cutting my stock to size with a circular saw and it’s guide rail. 


I then layed out my design. I created entry holes with a forstner bit and used my jigsaw to remove as much material as I had to. I tried to cut both sides at once by clamping them together. 


I used some corner clamps to temporarily keep everything together. I then added some glue and nails. I secured everything in place with screws. I first pre drilled pilot holes, then I counter sinked them and finally I screwed them in place. 


I then added the cleats before I place the top and bottom panel. 


I also added a shelf.


I almost used a complete sheet of 15mm OSB for this project.


I actually cane out much more robust than I expected. But that was it see you soon with a new project video.


Disclosure: Some of the links below are affiliate links, meaning, that at no cost to you, I get a small commission if you click through and make a purchase.

Saturday, May 22, 2021

Woodturning a rosary with a wooden cross and beads


Tools and materials I propose:

Lathe

Wood turning tools set

Bandsaw

Chuck kit

Tormek T8 Sharpening System

Tormek BGM-100 Bench Grinder Mounting Set

Tormek Woodturner’s Kit

Diamond Grinding Wheel Dresser


In this video I make a wooden rosary. I turned the cross out of iroko wood. The beads are made out of ebony and iroko.


First of all I installed the zero clearance insert on my table saw. I had to deal with really small pieces so that was a must. 


After cutting my stock to size I created the half lap joint of the cross. 


I then glued the pieces together. I started turning the cross. This was mostly skew work. Once I finished the first side I remounted the piece to do the other. 


I then blended everything using a flat sanding block. 


To make the beads I had to make a special tool to make my life easier. I first used my diamond stone flattening tool to roundover the wheel of my grinder. Then I made a beading tool using an old chisel. I kept dipping the tip in water to cool it down. 


Then I started making my beads. I first established the size using the beading tool. Then I used a parting tool to remove material form the sides of the beads. Then I used the beading tool again to shape the bead. I then drilled the hole and cut off the bead with a saw. 


I sanded the beads on the lathe using a disc sanding attachment. 


I finished all the pieces by dipping them in mineral oil.


Then I connected all the pieces with a leather string.


And my rosary was ready. It was a pretty interesting woodturning project, but that was it. See you soon with a new project video. 


Disclosure: Some of the links below are affiliate links, meaning, that at no cost to you, I get a small commission if you click through and make a purchase.

Saturday, May 15, 2021

Woodturning a musical egg shaker


Tools and materials I propose:

Lathe

Wood turning tools set

Bandsaw

Chuck kit

Tormek T8 Sharpening System

Tormek Woodturner’s Kit

Buffing kit


In this video I make a wooden hollow egg maraca out of basswood. I turned the two halves separately and then glued them together. I added rice inside of them to make the noise. 


I would really like to thank Mr. Colwin Way because one of his tutorials helped me a lot with this project, you can check it out here: https://www.youtube.com/watch?v=0PW1yRGiyEk


I begun by roughly drawing the shape I was going for on my stock.


I then created the tenons for my chuck and cut the piece in half on the bandsaw.


I rounded the piece with a roughing gouge and a skew. I then made a depth hole and hollowed the interior with the hook tool which works really nicely on end grain.


I then turned the other half of the egg. 


I added rice inside. I added the amount of rice that sounded better in my ears. I then glued the two halves together.


To clean the bottom of the egg I made a jam chuck. This is just a tube in which the egg fits snuggly. I also added a hole in the bottom. In case the egg stuck I could use a dowel to pop it out. I used the centre hole to put the egg nicely centred in the jam chuck. I then used a bowl gouge to clean it up. After sanding I used my buffing wheel system to polish my egg.


And my little egg was ready. It came out really nice but that was it. See you soon with a new project video.


Disclosure: Some of the links below are affiliate links, meaning, that at no cost to you, I get a small commission if you click through and make a purchase.

Saturday, May 8, 2021

Woodturning and woodcarving a spoon


Tools and materials I propose:

Lathe

Wood turning tools set

Spoon carving knives

Mineral oil

Flat file

Wire Burning Kit

Caliper set

Round file

Spoke shave

Cabinet scrapers set

Bandsaw


In this video I make a wooden spoon out of basswood. I first turned it on the lathe and then used hand tools to carve and shape the rest of it.


I first drew half of the spoon on my blank. I then cut it on the bandsaw. I used the cut off part as a template to draw the other half.


I then used a roughing gouge and a bowl gouge to shape the piece as much as I could on the lathe. 


I used my divider to mark equal distances. I then used a skew chisel and my wire burning tool to mark the handle a little bit. 


To shape the rest of the spoon I used a spoke shave and files. It is important to follow the grain in order to get clean cuts with the spokeshave. 


To hollow the spoon I used a hook carving knife. I cleaned the knife marks with a goose shaped cabinet scraper.


I sanded from 100 to 400grit and finished my spoon with mineral oil.


And my spoon was ready.


But that was it, see you soon with a new project video. 


Disclosure: Some of the links below are affiliate links, meaning, that at no cost to you, I get a small commission if you click through and make a purchase.

Saturday, May 1, 2021

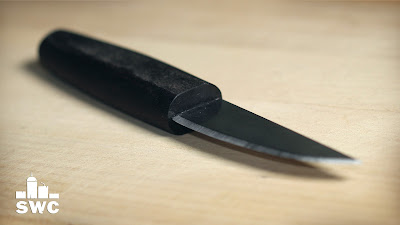
Making a wood carving knife from an old table saw blade


Tools and materials I propose:

Angle grinder

Metal cutting discs

Belt sander

Chisel set

Block plane

Spoke shave

Trim router

Foredom Woodcarving Kit

Tormek T8 Sharpening System

Hand Tool Sharpening Kit


In this video I make a classic woodcarving knife out of an old table saw blade and a piece of Indian rosewood. I want to thank my friend Giorgos Laskaridis for sending me this beautiful piece of wood.


I begun by cutting the shape of my knife using my angle grinder and my rotary tool.


I finished shaping on the belt sander. 


I then used my Tormek sharping system to sharpen my blade. I created a 22,5 degree bevel on my edge. 


Then I polished the blade with sandpaper and some polishing paste.


I made the handle out of a piece of Indian Rosewood. I used my trim router to carve the groove and a I fine tuned it with a chisel. 


I then epoxied all the pieces together. 


I shaped the handle using the belt sander, the spoke shave, chisels and sand paper. I finished it with mineral oil. 


And my little knife was ready. The blade seemed hard enough as it was so I didn’t do and hardening.


But that was it see you soon with a new project video.


Disclosure: Some of the links below are affiliate links, meaning, that at no cost to you, I get a small commission if you click through and make a purchase.