Thursday, March 30, 2017

How to make a wooden toy mouse, on the lathe


I made this little toy, out of a scrap pine piece I had.

First of all I used a hand saw to cut the piece to  size.

I then marked the centers on the front and back and mounted the piece on the lathe between centers.

I then used a round scraper to turn the piece round. I also used a straight chisel to create a tenon on one end, in order for the piece to fit my chuck’s jaws.

I mounted the piece on my chuck and used a bowl gouge and a spindle gouge to shape my mouse’s body.

To remove as much material as I could, before parting the piece I used my skew chisel.

I then sanded the piece from 100 to 300 grit. I finished the surface with yorkshire grit while reducing my lathe’s speed at 500rpm.

I then used my flush trim saw to part the piece of the lathe. I use that kind of saw for this job, because it’s thin and as a result it removes less material. It’s also leaves a much smoother surface.

I then moved on my disc sander and sanded the back. I also sanded one area of the piece flat. This way my little mouse can sit nicely on a flat surface.

I then used the skew chisel and a spindle gouge to turn the ears of my mouse.

To mimic the roundness of my mouse’s body. I removed as much material as I could with my rotary tool and then used the mouse itself as a sanding block. This way I created an inner curve on each ear which matched the outer curve of my mouse’s body.

I then cut a couple of small nails to size, I drilled a few pilot hole and glued the nails in place with super glue. I then glued the ears in place. The nails add a little extra support to the ears.

I then drilled the hole on the back for the tail. I mixed some five minute epoxy and glued the tail in place. The tail is just a piece of cylindrical rubber I’ve had from an old piece of clothing.

After a bit more sanding my little mouse was now ready!


Thursday, March 16, 2017

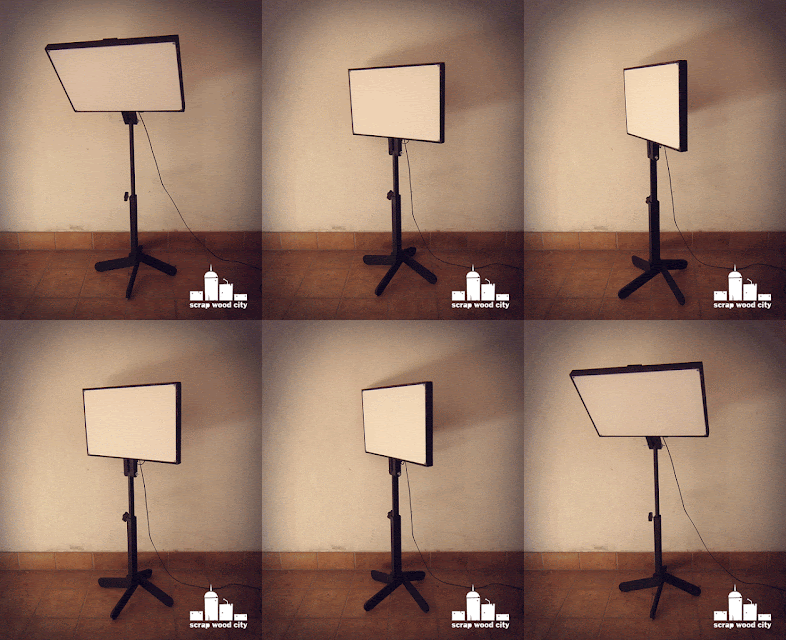
How to make a floor standing DIY video light with LED strips


I made this floor standing light using mostly MDF, pallet wood and led strips. It's light is kind of neutral cold. You can choose the LEDs you want in order for the light to have the color that suits your needs. It is also dimmable, which means you can adjust the brightness of the light.

I begun by cutting a few pieces of 10mm MDF to size on my table saw. For the cross cuts, I used my cross cut sled.

I then glued the sides of my frame using wood glue. I used corner clamps to keep things in place,  predrilled holes and added two screws in every corner of the frame.

I used the bandsaw to cut four wood pieces which I glued in the corners of my frame.

I then cut the backside of my light to size on the table  saw. Because the acrylic front was more sensitive I cut it on my bandsaw. My bandsaw has a finer tooth blade and cut the milky acrylic pretty nicely.

The acrylic front and the MDF back are screwed in place. The screws go into these small wood corners blocks I cut earlier. Ofcourse I predrilled before adding the screws to avoid wood splitting. 

The acrylic sheet in the front helps diffuse the light creating better outcome in the image of the video.

I then used the thickest plywood I had to create two pieces that would be screwed on the frame. I taped them together, sanded them flush on the disc sander and drilled a hole through them in the drill press. I then glued and screwed them in place. To keep them aligned I passed through both of them a metal screw.

I then added a cleat on the back of my frame. This acts as a reinforcement to the structure but it also provides a place for to mount the electric parts of the light.

I then made the post of the light. I shaped it on the disc sander.

The post slides in a pocket which I made out of 12mm plywood. I glued and nailed it together.

I then made four identical legs out of scrap pallet wood. I Cut them on the bandsaw and shaped them on the disc sander. I then predrilled and screwed them in place.

I cut a small metal piece to size, using my angle grinder. I drilled a few holes on the drill press. I used a tap to create threads in the middle hole. This way 6mm threaded rod can tight the post of the light in place.

I then designed a knob on a scrap plywood piece and cut it out on the bandsaw. I used my rotary tool to sand it’s curves.

I then flattened one edge of 6mm threaded rod with my angle grinder. I drilled a hole on the knob. I mixed some two part 5 minute epoxy glue and hammered and glued the rod inside the knob.

Video and photography gear is usually black because you don’t want it’s reflections in your video shots. So I painted all the parts of my light with black matte spray paint.

Now it was time to connect the electrics. I layed out the LED strips on my panel. You must cut them in the places where there is a scissors symbol. I then soldered the positive poles with each other and then the negatives with each other. I then connected the power source to the dimmer and then the dimmer to the LEDS. I made a test and everything worked out OK. 

I then added some hot glue to secure the strips better in place. Their adhesive does not always hold well. 

I mounted the power source and the dimmer on the back of my light. At this point I had to disconnect the LEDs. So I passed the cable inside the light through a hole and reconnected everything. I used electrical tape to make sure the soldered parts don’t touch and I also added some hot glue to make sure the cables were nice and secure. 


My video light was now ready and it works really well. Perhaps in future I will add more LEDS to make it brighter. I can also make a couple of other panels with different colors on the lights in order to achieve different color balances in my videos!


Wednesday, March 8, 2017

How to make a wooden cat shaped yarn bowl, on the lathe


I came across this idea on line and I thought it would be a cool woodturning project. 

So this is my version of it out of a piece of lime tree.

First of all I had to glue three square pieces of wood in order to get the thickness I needed. 

To do that I first used a hand plane to flatten all the pieces. I clamped each piece on my bench, used chalk to mark the area and then with thick passes perpendicular to the grain I flattened the piece. To smooth the surface I replaned it with the grain and less heavy adjustment on the plane iron. At the end I used the side of the plane to check that everything was flat enough.

I glued the three pieces together with wood glue and clamps.

I then found the center of my block and drew a circle inside the square edges.

I used a hand saw to cut the corners of my block, in order to save some time on the lathe.

I mounted the piece on the lathe using a face plate and used a round scraper to turn it true. I then moved to a bowl gouge and shaped the exterior of my bowl. To smooth things out, I used a sharp straight chisel to do a smoothing pass.

After flattening the bottom of my bowl with a flat chisel, I used the skew and a flat chisel to create tenon in order for the bowl to fit my chuck.

I then mounted the bowl on my chuck, and used a forstner bit on my tailstock to remove as much material as I could and establish roughly the depth of my bowl.

I started hollowing with the bowl gouge and then moved to the spindle gouge. When I was getting close to the sides, I used the skew chisel to create relief steps and then used the spindle gouge to smooth things out. 

I used my depth gage to see where my depth was and realized that I could go a bit further. So I used again a forstner bit to reestablish the depth of my bowl. 

I then finished hollowing and roughly sanded my bowl with 100grit.

I used a pencil to draw the cat shape. I then used the fret saw to cut my shape. I also drilled a few relief holes on the back where there was the spiral shape.  

I used my rotary tool with the drum sanding bit to rough sand the lips of my bowl. I then hand sanded the whole thing. For difficult areas, I cut the sandpaper to small stripes and used scrap pieces of wood as sanding blocks.

I drilled the eye holes with my drill and finished the pieces with 5-8 coats of clear glossy spray lacquer while sanding between coats. 

The bowl is ready and I think it came out really nice. 


It will be a gift for my friend Oops Loops who creates beautiful things with yarn.


Friday, March 3, 2017

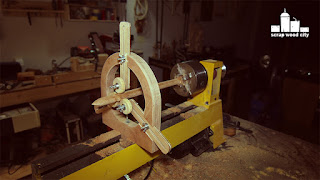
How to make a spindle steady rest for the wood lathe.


When you turn long thin items on the lathe you get many vibrations which make the turning process much more difficult. 

I made this spindle rest out of plywood and scrap spruce pieces.

First of all I used my calipers to take a couple of measurements from my lathe’s rails.

I then cut the basic shape of my rest on my table saw and bandsaw.

At the end of the jig I created a tenon the fits snuggly between my lathe’s rails. I then drove the jig against the chuck on which I had added the center chuck. This way I marked the exact center of the turning on my plywood. 

With this center I created two circles. I then divided the circles in three equal parts using a compass.

I cut the outer circle on the bandsaw. I drilled an entry hole on the drill press and used my jigsaw to cut the inner circle.

I then used the table saw to cut the sides. I I used my cross cut sled with a stop block to cut the piece in three equal parts.

I marked the size of each piece on the spindle rest and used my router to open up three grooves. I completed the routing in two passes with a straight bit. I finished the groves with a sharp chisel and a mallet.

On the side pieces I drilled entry holes and cut out an inner piece on the scroll saw. Using a file I cleaned up the scroll saw marks.

I rounded over the edges on the disc sander.

I then used the bandsaw again, to cut a circle out of plywood. This piece pushes against the rails and locks the spindle rest in it’s position. A bolt goes through the spindle rest and the circle and washers and butterfly nuts, hold them in place. I cut the bolt to size with a hacksaw and rounded over it’s edges on the disc sander. I did that in order for the nut’s threads to grab smoothly on the bolt!

I then turned the three wheels on the lathe out of a scrap spruce piece. I used a caliper and a straight chisel to turn them to size. I then used the parting tool to isolate them. I also used a spindle gouge to round over their edges. I drilled a hole through all three of them using the drill chuck on my lathe’s tailstock. I used a flush trim saw to part the wheels of the chuck, I then sanded them flush on the disc sander.

The wheels, should spin freely. To achieve that, I first added a screw which I secured in place with nuts. I then added a washer and then the wheel. I added one more washer and then added two nuts screwed against each other. This way the nuts stay in place and the wheel can spin freely like it would if it had an inner bearing.


My spindle steady rest was ready. It need a few fine tunings but it works really well.