Tools and materials I propose:
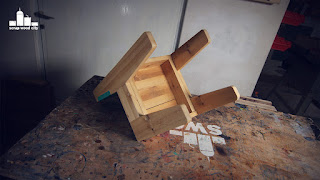
I made my little chair out of reclaimed pine lumber. You can use pre planed clean lumber, straight from your lumber yard.
First of all I had to make the wood useable again. I first removed any nails. Then I cut it roughly to size with my circular saw and a speed square.
I then ripped the boards to width on the table saw. I squared all the ends with my cross cut sled. Finally I passed all the boards, through the thickness planer.
I then started designing my chair. I made all the cross cuts on the table saw. You can also use a miter box and a hand saw. I cut the angled parts on the bandsaw and then sanded them on the belt sander. Alternatively you can use a chisel and a hand plane and achieve the same result.
I then cut the side pieces. I used 8mm dowels to connect all the parts together. I first named all my joints. Then I drilled the first holes, added the center pins and then drilled the matching holes.
I then glued the sides of my chair.
I used a washer as a guide to draw curves on the edges. I then rounded over the edges on the belt sander.
Next I had to cut some notches for the back rest. I used the bandsaw to do that. Alternatively you can make a series of cross cuts and then remove as much material as you can with a chisel. In both cases finish the job with a sanding block.
Then I cut the cleats on which the seat of the chair rests upon. I did that on the table saw. I glued them in place and added dowels for extra strength. I cut the dowels flush, with a flush trim saw.
Finally I glued the main body of the chair together. Again using 8mm dowels.
On the table saw again, I cut the pieces for the seat and the back rest.
I glued and nailed the seat pieces in place. I had a small gap which I filled with a thin piece. I used a block plane and a chisel to trim it flush.
I filled all the imperfections with wood filler.
Finally I started sanding with my random orbit sander. Once I sanded most parts I glued and nailed the back rest in place. I also used screws here. But first I drilled pilot holes and created counter sinks.
I finished sanding.
To make the chair sit nicely on a flat surface I glued a shim on one leg. I trimmed it flush with a chisel and sandpaper.
I then masked the areas around the back rest and the seat. I painted with latex paint. It is important to paint from the tape to the wood in order to achieve really sharp edges. I applied two coats while lightly sanding between coats. The heat gun helps to speed up the drying process.
Finally, I finished my chair with two coats of clear water based varnish.
At this point my chair was ready. It came out great. The only thing I would change is the screws on the back rest. I thing dowels would do just fine.
Anyway, I hope you liked my little chair, because that was it. See you soon with a new project video.
Disclosure: Some of the links below are affiliate links, meaning, that at no cost to you, I get a small commission if you click through and make a purchase.


No comments:
Post a Comment