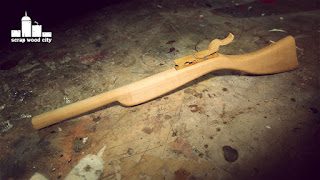
I made this wooden DIY toy gun from a piece of maple.
First of all I jointed one side of the maple board on my jointer. After I had established one flat side I reduced my material’s thickness on the thickness planer.
This toy is based on a template I designed. I glued the template on the wood using spray adhesive.
I then cut out the basic form of my rifle on the bandsaw.
I flattened the top using a planer.
I used flat and cylindrical files and rasps to clean the piece form the saw marks.
Using my heat gun, I gently removed the template from the wood.
I then switched to the spokeshave to round over as many edges as I could. When using the spokeshave it is important to always go with the direction of the grain. If your cuts are not clean just change the direction you use the tool.
In the areas the spokeshave could not reach, I used my old trusty files and rasps.
I then sanded my piece starting with 100grit. I then moved to 240 and stopped at 320.
The trigger of my gun is just a wood clothes pin. To customize it a bit to fit my overall design I cut a small piece on my bandsaw.
I glued the little piece on the clothes pin and then glued the whole trigger on the rifle.
I finished the project with mineral oil.
At this project my little toy rifle was ready to shoot some rubber bands! :)


This comment has been removed by a blog administrator.
ReplyDeleteCan you share the template used?
ReplyDelete