


I made this mini lathe using my rotary tool and some scrap wood and metal pieces. It is made for manufacturing small items for modelism purposes.
First of all I cut a piece of 2x4 in two pieces. Those will hold the rotary tool. I used a hand saw and a miter box. I measured my tool with my caliper and drew a circle in the point I want my tool to be. I cut the circle with a coping saw. You can use a jigsaw or a bandsaw if you have one.
To clean the hole from the saw marks, I made a custom sanding block. Using a hand plane I rounded the bottom and glued a piece of sandpaper using two sided tape.
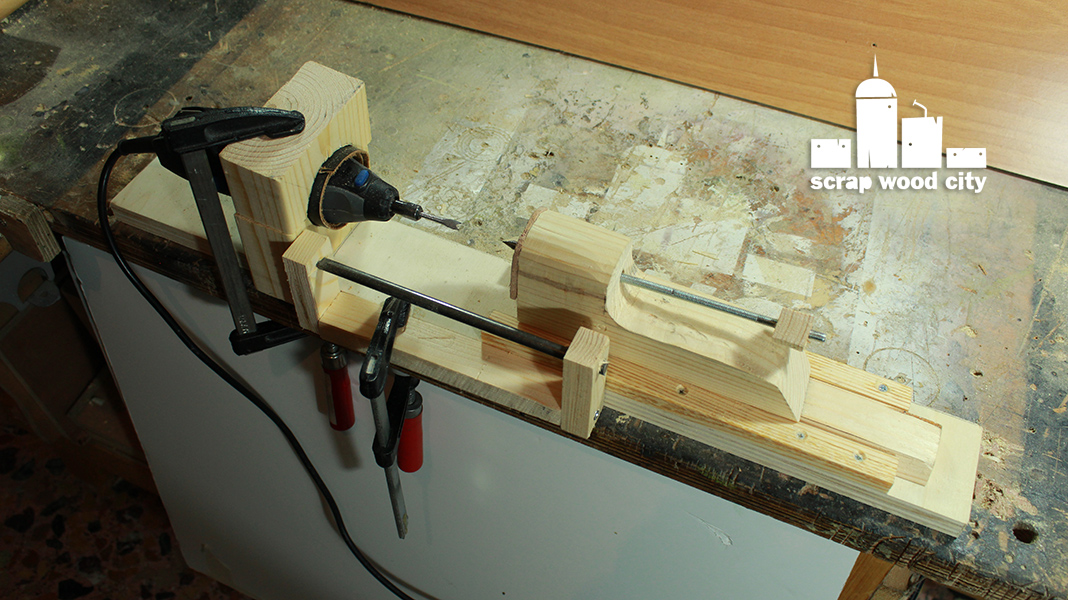
To secure the rotary tool I added a strip of leather between the tool and the holder. The whole thing is secured with a clamp on my bench.
The tool holder is secured on a plywood base. I made a mortise using a saw and a chisel and screwed the piece on the base. To add the screws, I first drilled a couple of pilot holes and I counter sinked them.
The tailstock of the lathe will slide on the base with a type of dovetail mechanism. To make the female dovetail i used my block plane on a small spruce piece. I secured the female dovetails on the base, using screws.
Using my caliper I measured the inner space of the rails and made the male dovetail part using again my hand plane at an angle. I also planed it flush with the female dovetails.
I used the sanding block I made earlier to make the rest of the tailstock. I cut the piece using my jigsaw. I secured the piece with the male dovetail using screws.
I used the rotary tool to mind the exact spot I needed the quill to be. I drilled the rest of the hole with a drill and hammered a t-nut in. On top of it I added a piece of plywood secured with screws.
To make the quill, I mounted a long threaded rod on my drill and grinded the edge on my grinder.
I made a tool rest using a metal rod and a few scrap wood pieces screwed together.
Back to the quill, I made a handle using a small wood piece. I drilled the the rod and wood on my drill press and added a long nail to secure everything in place. I trimmed the nail flush with a hack saw.
I needed a small chuck to hold the pieces on the lathe and to be able to fit on the chuck of the rotary tool. I used an M6 screw and with my drill and the grinder I trimmed it to fit on the rotary’s tool chuck. I dipped the piece in water often to avoid metal burning. I cut the bit to size with a hacksaw. For the tip of the bit I grinded on the grinder holding it with a plier. I also used my rotary tool with a grinding disk to grind a V on the edge of the bit. This way I can hammer the wood stock in before the lathe is on.
My lathe was now ready. I assembled it, added an oak dowel on the chuck, secured the quill in place and everything else with clamps.
I made a test using my skew chisel. It is nice that my rotary tool has variable speed choices. It is very useful on the lathe.
I hope you’ll like my mini lathe project, I think it is ideal for people who practise modelism.
------------------------------------------------------------------
I have made another mini lathe in the past, find it here.
Many people before made similar DIY lathes. Here are a few of them that inspired me:
No comments:
Post a Comment