Monday, April 22, 2019

Making a simple Easter bunny mechanical toy, out of plywood!


Tools and materials I propose:


Happy Easter everybody! This is a simple woodworking project out of 9mm birch plywood. I hope you'll enjoy it!

I begun by making a rough prototype out of OSB. I then created vector templates for the project. 

Mechanical toys require accuracy in order to work. So I also created a 3D model as a simulation. Everything seemed to work.

Next I layed out my templates on the plywood, based on the orientation of the grain. 

I coated the plywood with a layer of packaging tape. I attached the templates on the plywood using spray adhesive. Finally I added a coat of tape over the templates. This technique helps keep the templates in place while cutting. Also the templates can be removed really easily without leaving glue on the wood. To me this is the best method for attaching templates onto the wood.

At this point  I center punched all the holes.

Next I cut everything on the bandsaw. To cut the smaller parts safely, I added an improvised zero clearence insert on the bandsaw. 

I then sanded everything close to the template lines, using my belt sander. I used a chisel to reach some difficult spots. 

I drilled all the holes on my drill press. I then glued and nailed a few parts in place.

I connected the parts of the egg cell with two screws and sanded them flush on the belt sander. 

The bunny should fit loosely, so I sanded it a little bit.

As a shaft, I used an 8mm dowel. 

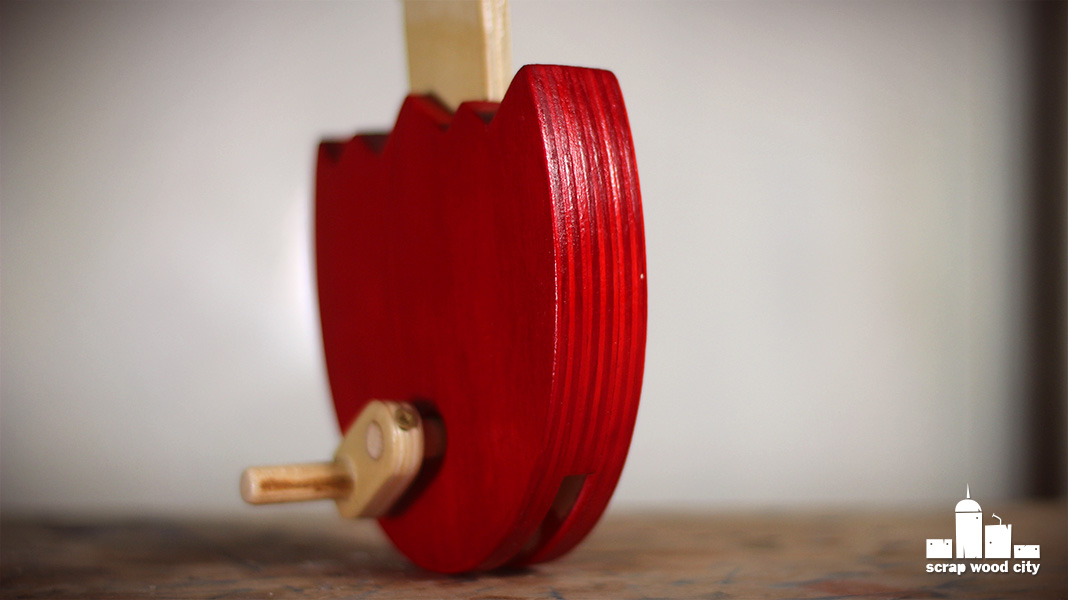
I stained the egg with water based dye. This has a vivid color but also leaves the grain pattern of the wood visible.

I then finished everything with water based clear varnish. 

I also lubricated the inside of the egg with my homemade beeswax and mineral oil finish.

Finally I glued the crank’s pieces in place. The leaver was secured in place with a screw, so I can remove it if I have to. 

And that was it. My little Easter bunny toy was ready.

I hope you enjoyed this video. Happy Easter everybody, see you soon with a new project video!


Disclosure: Some of the links below are affiliate links, meaning, that at no cost to you, I get a small commission if you click through and make a purchase.

Tuesday, April 16, 2019

Making a mini threaded picture frame, on the wood lathe


Tools and materials I propose:

This project was a good excuse for me to practice thread chasing on a woodturning lathe. I made it out of apricot wood. 

I also want to thank Mr. Sam Angelo, the Wyoming Woodturner for his thread chasing tutorials.

First of all I split an apricot log with an axe, to make my blank. I then cut it on the bandsaw.

Next I clamped the blank between centers on the lathe, and turned it true with the roughing gouge. 

I filled a few cracks with super glue to prevent them from expanding further.

I used the skew chisel to make the tenon for the chuck. I then parted the piece off and cut it in half on the bandsaw. 

I made the female part first. I hollowed it with forstner bits. The lathe was set at it’s lowest speed. 

At this point, I used my homemade recess tool, to create a groove on the back of my female threads. This will give my female thread chaser a way out, once it completes a cut. 

Then using the female chaser I started creating the threads. The lathe was still set at it’s lowest speed. I begun threading at an angle and gradually I tried to turn the tool parallel to the sides of the wood. Once the chaser creates the first couple of threads, then it kind of follows the threads on it’s own. Minimal pressure needed here. An old toothbrush can help you clean the threads and check how the threading process evolves. 

Once the female side was ready. I created a slightly larger tenon on the male side. I then started threading with the male tool. I kept checking the fit between the male and the female side. It’s better to take it slow here, because if you remove to much material, you can’t go back. 

I then connected the two sides and shaped them together a little. I then parted the piece off the lathe. 

On the back of my frame I epoxied a rare earth magnet in place. I then sanded the piece and finished it with my homemade, beeswax and mineral oil finish. This also acts as lubricant for the threads. 

I used the plastic from an old package as my frame’s glass. I then printed a photo of Scrapy to place inside of my frame. 

I am still a newbie at thread chasing but it was fun experimenting with this technique. My next goal is to match the grain between each threaded side.

I hope you’ve enjoyed this project, because that was it. See you soon with a new project video.


Disclosure: Some of the links below are affiliate links, meaning, that at no cost to you, I get a small commission if you click through and make a purchase.

Monday, April 8, 2019

Making the “ocean ripple” pendant, out of resin and olive wood!


Tools and materials I propose:


I begun by cutting a beautiful piece of olive wood on the bandsaw. 

Silicon cake molds we use in the kitchen, work perfectly with resin.

I mixed some slow setting epoxy resin. I also added a few drops of blue dye. Then I degassed the resin on my vacuum chamber. 

After about a week my castings were rock hard. 

I chucked a sanding adapter on the lathe. With that I flattened the bottom of my casting.

I then hot glued the piece on a wooden block which was mounted on a face plate. I turned the piece true with a flat carpenter’s chisel as a scraper. 

Then I parted the piece off and flattened both the casting and the block again.

The ripples were made with eccentric turning. So I hot glued again the piece using an eccentric pivot point. 

First I drilled the hole for the string.

I then used a homemade round scraper to create my ripples.

Once I was happy with my shape, I parted the piece off and started sanding.

I begun with 100grit, moved on to 220 and 340. I started wet sanding at 500 using mineral oil. I sanded until 1000 and then continued with my micro mesh sanding pads.

I then set my lathe at it’s lowest speed and buffed the piece with my three polishing wheels.

Overall the pendant came out nice. If I made it again I would use less blue dye, to increase it’s transparency. But this is ocean ripple and deep blue is a perfect match.

Anyway, I hope you enjoyed this one, because that was it!

See you soon with a new project video!


Disclosure: Some of the links below are affiliate links, meaning, that at no cost to you, I get a small commission if you click through and make a purchase.

Wednesday, April 3, 2019

How to make a DIY sphere making jig for the lathe


Tools and materials I propose:

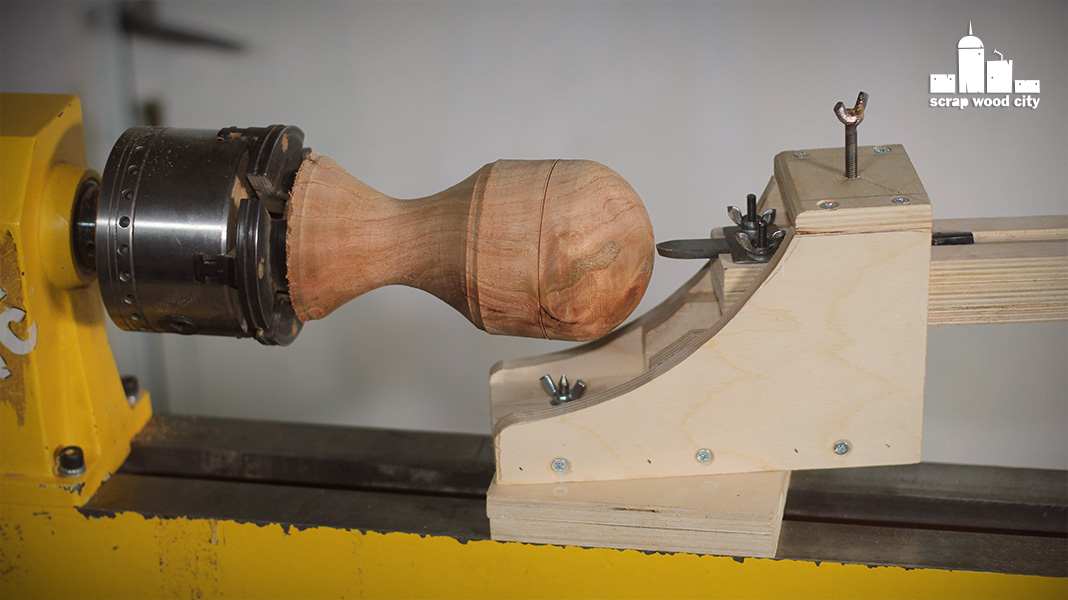
This is a simple ball making jig for your lathe. I used 9mm plywood, 6mm threaded rod, washers, nuts and an old woodturning scraper to make it. 

First of all I made a prototype. Knowing that the basic idea worked, it was time to make the final version of the jig. 

I begun by cutting all the parts for the base on the table saw. 

I used the live center of the lathe to align the jig with the center of the lathe. 

Then I glued and nailed the pieces of the base together. 

I cut the curved sides on the bandsaw. I used the first cut piece as a template for the other one. 

I glued and nailed the sides in place but I also reinforced them with screws. 

To make the cutter I used an old, cheap woodturning scraper.

I roughly shaped it with the grinder. Water helped me keep the tool cool. Then I tilted my grinding wheel’s tool rest a by few degrees and sharpened the edge of the cutter.

I made a groove on the table saw to keep the cutter in place. I added some material on the bottom of the cutting mechanism so the cutting edge was just under the center of the lathe.

A piece of steel and a couple of threaded rods with nuts and bolts keep the cutter in place. 

To make a knob for the top I silver soldered a butterfly nut on a 6mm threaded rod. 

At this point the jig was ready for a test. First I prepare the stock so the jig can reach as far as possible. Then I tried it out. I did shallow passes instead of deep fast cuts.

It worked nicely. I hope you’ll find my ball making jig useful!

See you soon with a new project video! 


Disclosure: Some of the links below are affiliate links, meaning, that at no cost to you, I get a small commission if you click through and make a purchase.

Thursday, March 28, 2019

Sharpening a chisel with the angle grinder - Quick and dirty hack


Tools and materials I propose:

Let’s assume you are in a job site and you are chiseling something. Suddenly you hit a nail and you ruin the sharp edge of your chisel.

You are in a job site, away from your desktop grinder or your sharpening stones. But fortunately, like in most cases you carry your angle grinder with you. This is how you can use it to fix your dull chisel fast and move on to your work. 

First check the direction your wheel is turning. You have to place the chisel on the right side of the wheel, so that the sparkles won’t fly on your face. 

Your angle grinder spins really fast. As a result it will increase the heat of your tool really fast. This can burn your tool and destroy it’s hardness. So have some water close to you and keep your metal cool by dipping it into the water often.

First of all hold your tool perpendicular to the wheel to flatten it’s front edge. Then angle your tool to match the bevel you want to create. Every now and then check your tool and try to adjust the way you are holding it so that you grind as straight as possible. 

Remember to keep your tool cool.

When the burr starts to form you are close enough. 

The metal cutting discs are pretty aggressive. So now you can add a sanding adapter on your grinder and add a sanding disc. You don’t need to move higher than 240 grit. Once you have a burr throughout the length of your cutting edge, stop the grinder, turn your chisel around and remove the burr by hand.

If you don’t have the adapter, you can place the sandpaper on a flat surface, add some water and repeat the whole process by hand. I used a piece of melamine, but you can use a ceramic tile, a piece of glass or plexiglass.

At this point your chisel should be sharp enough for you to move on to work. But if you wear a leather belt you can take things one step further. Add some oil on the back of the belt and strop your chisel for a couple of minutes. This can give you a razor sharp edge. 

I hope you found this tip useful. But that was it, see you soon with a new project video!


Disclosure: Some of the links below are affiliate links, meaning, that at no cost to you, I get a small commission if you click through and make a purchase.

Thursday, March 21, 2019

Making a wooden zoetrope with right angle gears - Animation toy


Special thanks for the inspiration and info to Mathias Wandel: Right angle gears video
I also wan to thank Peter Brown for his inspirational video.
Tools and materials I propose: Lathe

This is a classic vintage animation toy. I just made my version of it, out of bass wood and plywood. 

After making a rough but working prototype, it was time to make the final version of the project.

I set the fence of my table saw at the correct width and cut my plywood pieces to size. For the cross cuts I used my cross cut sled.

The gear box would be joined with half lap joints. I created them on my table saw. I set a stop block on my cross cut sled and did a series of passes to create the grooves. I sanded a little bit with a sanding block.

To make the gears I created templates based on Mathias Wandel’s gear generator. Mathias has also made many tutorials on making wooden gears so I followed his instructions quite a bit.

I added tape on the plywood and then glued the templates on the tape with spray adhesive. This would help me remove the templates easily, once I was done. At this point I marked the centers of the gears and removed most of the material on the bandsaw.

To cut the bevels of the gears I made a new base for my bandsaw that has 14 degrees angle. I cut half of the bevels. The blue lines of my templates. Then I flipped the base over and cut the mirrored bevels ( the red ones). I sanded with a popsicle stick which had sandpaper glued on it with double sided tape.

At this point I glued and nailed the gear box  sides together. Using a wet rag I wiped off the excess glue. 

I made a few holes with the drill. 

The gears are glued on 6mm dowels. 

Using a hole saw, I made some spacers. On the bandsaw I made relief cuts, so I can remove the spacers easily if I have to. The spacers are fixed in place with a screw. 

I added a spacer and two washers to each gear. At this point the gears worked nicely.

I made a handle which I shaped on my belt sander.

I filled the nail holes and sanded everything smooth with my random orbit sander.

Following Mathias advice I varnished everything so the gears wood work a bit smoother. I used clear water based varnish.

The top piece was made out of basswood. I had to glue two pieces together, so I first flattened them on the jointer - planer machine.

I then glued the pieces together. Once the glue was dry, I squared my stock on the jointer and table saw.

At this point I drew my guide lines and cut my grooves on the table saw. For the diagonal grooves I made a simple 45 degree jig so I could hold the piece on my cross cut sled.

This worked out and I mounted the piece on my lathe using a face plate. 

I shaped the top with the bowl gouge. I only used a flat chisel as a scraper to clear it’s bottom corners. 

During the assembly I added my wax and oil paste to all the meeting surfaces. Then I assembled all the parts together. 

The grooves were too large for the animation effect to happen so I made a paper insert for the top with smaller slots. Perhaps in future I will remake the top.

Then I added my animation inside the top and started playing.

This project was more difficult than I originally thought. But it worked out in the end. 

I hope you liked this one, because that was it. See you soon with a new project video. 


Disclosure: Some of the links below are affiliate links, meaning, that at no cost to you, I get a small commission if you click through and make a purchase.

Tuesday, March 12, 2019

Making a resin and olive wood box on the lathe


Tools and materials I propose: Resin Lathe Wood turning tools set

I made a resin and olive scrap wood blank. I have also added a few drops of transparent yellow dye in the resin.

I cut one edge of the blank on the bandsaw and flattened it on a sanding block. I then hot glued the blank on my lathe. I just used a face plate and a wood block.

The round scraper does a really good job when it comes at resin turning. I made a finishing cut with a flat chisel and I used the parting tool, to cut a piece off.

To hollow the interior of the box, I first reduced the speed of the lathe at minimum. I then used forstner bits to remove most of the material. I finished hollowing with a spindle gouge.

I started sanding at 100 grit and moved through the grits. At 500 grit I started wet sanding with mineral oil.  At 1000 I added abrasive paste and used a paper towel to polish the piece.

I parted the piece off and buffed it on my polishing wheels.

At this point I realized I had an awful scratch in the interior of the box. I used a piece of leather, to remount the box on my chuck without scratching it. I then made a small side scraper from an old chisel. I did most of the shaping of the tool with the angle grinder. Next I sharpened it on my grinding station.

Then I gently cleaned the interior of the box and sanded it. 

This worked out nicely.

I then made a cap out of a scrap olive wood piece. I did most of the shaping with the spindle gouge and a skew chisel. Olive wood is pretty hard and dense, so it can be polished really nicely.

At some point I wanted to do a bit more polishing on the box. But the polishing wheel made it fly off of my hands. So I had a few more scratches to deal with.

I turned a spindle on which the box  fitted snuggly. Then I resanded and polished it.

Although the box still had some imperfections, I decided to stop here. Overall it came out nice.

It was a really interesting and challenging project. All the disasters happened during the build were a good chance for me to demonstrate a few interesting techniques.

Experimenting with wood and resin is something I really enjoy this period.

But that was it, see you soon with a new project video!


Disclosure: Some of the links below are affiliate links, meaning, that at no cost to you, I get a small commission if you click through and make a purchase.