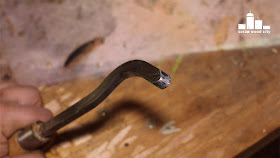
With a tool like that you can hollow forms because it can penetrate in really difficult areas.
I made it from an old file, because files are made of tool steel, which should work nicely on a project like this one.
First of all I cut the steel to size with my angle grinder. I also used the angle grinder to remove most of the file marks.
I finished cleaning on my belt sander.
I then used my tilting base on the grinding wheel to grind the bevel of the tool at a consistent angle.
I heated the tool to red hot with my propane torch. I used two metal bars mounted on my bench, and while it was still hot I bended the steel to shape. I repeated this process a few times, until I was happy with my tool’s shape.
I then placed the steel in my home made foundry and when it became red hot I dipped it in oil to harden it. To reduce the tool’s hardness and prevent it from snapping I put it in the oven for 2 hours at 180 degrees Celsius.
I cleaned the tool with sandpaper and oil. I also used my rotary tool to clean the curvy parts.
I cut a piece of maple on my bandsaw, and used my chisels and a mallet to carve a groove for the tool to sit in.
I glued the pieces together using wood glue and clamps.
I mounted the handle on the lathe and used a spindle gouge to round it over.
I used my rotary tool to cut a piece of metal tube.
I created a tenon to receive the tube. I used the scraper to make a curve and the skew to round over the back. I used a spindle gouge also. I sanded the piece on the lathe and finished with mineral oil.
I used my home made disc sander to sand the metal ring flush with the tool handle.
I glued everything together with two part 5 minute epoxy glue.
I sharpened the tool using several grits of sand paper, a wood sanding block and oil. I finished with a piece of leather with polishing compound. Every time I created a burr I removed it and moved to a finer grit.
At this point my tool was ready. I think it will come out really useful in future wood turning projects.
I hope you liked it!


